Tracking Nightmare. Chroma Hell. Rotorture. Pain. Suffering.
One fine VFX job.
My latest single-seat piece turned up to be muuuuuch more difficult to carry out than initially thought… But totally worth it.
Featuring… David Bisbal. Yeah, once again. Why not? I’m not sure wether to love him or take him out. He’s all right, after all. Seems a good fella.
BE WARNED!: you’re about to trespass the events horizon into the infinite density of a detailed chronicle of this 4 weeks job. Truly, a black hole per se. Just wanted you to join me into darkness.
Some call it… catharsis, you know…
Story goes… After finishing World Tour 2014 visuals production for DB, dearest Kike Maíllo came along with this sequence for the forthcoming DB videoclip, “Sí pero No”. The whole thing would happen in the mensroom, DB dueting with his reflection on a huge mirror, watching cabaret girls coming out of stalls and dancing around. To kick some fantasy in, Kike wanted walls to come alive at some point, bluejays popping in and out from the wall, carving volumetric patterns…
Couldn’t help taking the bet, even knowing my cards were crap and pro players had left the boat before violins would drown into VFX treacherous waters: this very same sequence had been handed to another post studio before us…
Don’t like challenges, people. Honestly, I don’t. The I-like-challenges attitude is just another empty construction of our times, just 3 words handy at job interviews to show “initiative”… Means nothing.
Don’t like challenges, all right, but I just keep on crashing into them…
So… first thing to do was stablishing what the fuck to do with this molotov cocktail. Goal was, of course, to go for the wonderwall. But given the difficulties the other team had faced before me, Kike was open to any suggestions. Wether original idea was practicable or not, one thing was clear: green screen had to go.
Next step: stablishing main tasks sequence for this job. At first sight, key ingredient for this pie would be camera tracking. Everything would depend on that. After that, CG modelling-shading-lighting-animating. Then, chroma keying, some roto and final compositing.
So… where were the black holes here?. I’ll tell you where: this was an e-ter-nal 68 seconds continuous sequence shot, too long to track in one go and no good enough reference points present all throghout the entire sequence to do it, no measures taken on set to accurately model wall or other elements to assist tracking, chroma screen grading through different green tones (lovely unglued on right lower corner…), out of focus foreground DB against chroma screen (very difficult blurry transition between edges), that lovely curly hair DB wears, long haired girls dancing with rapid movements (forcing almost a frame by frame roto), some candles to be chroma keyed as well (again, hard times keying out flame and glow aura from green screen), and footage not matching the graded reference clip.
Inferno, people.
Final step of this first stage was evaluating difficulties on the field before oficially committing myself to get into the mensroom with DB. Did a quick test, just a few seconds, just the hardest tasks. Everything seemed to be reasonably… doable. I rapidly estimated total time to wrap the whole sequence up: 6 days… So näive…
So pulled my pants down and got into the mensroom.
OK, I’m in the trench now. First mission: Camera Tracking. I knew it would be impossible to do a one-click-track for this baby. But I didn’t want to end up with 10 camTracking nodes, all with different interpretations of the toilette 3D layout, different point clouds, different distances…
Split up the sequence into two pieces (there’s a blackout at frame 645, 20 frames long, which forced me to close tracking process there and use a new node once lights come back), and unDistorted the whole thing.
Still too long sequences, but I managed to pull the first one (645) frames quite easily and accurately. Except from voodoo, tried 1001 methods, taking advantage of new features in Nuke 8. Basicly, workflow was: selecting a series of continuous frames where all four corners of green screen were visible and trackable. Then pulled a very low error track, very solid, created a point cloud and evaluated its consistency with the actual 3D space. Once confirmed a coherent point cloud, introduced some estimated distance reference into cameraTracking Scene and modelBuilt a simple rectangle where the chroma screen was placed, drawing it slightly larger than the actual green area, making plane edges run along wall lines and corners stick tightly to lines intersection on the wall to follow up camTracking performance more accurately.
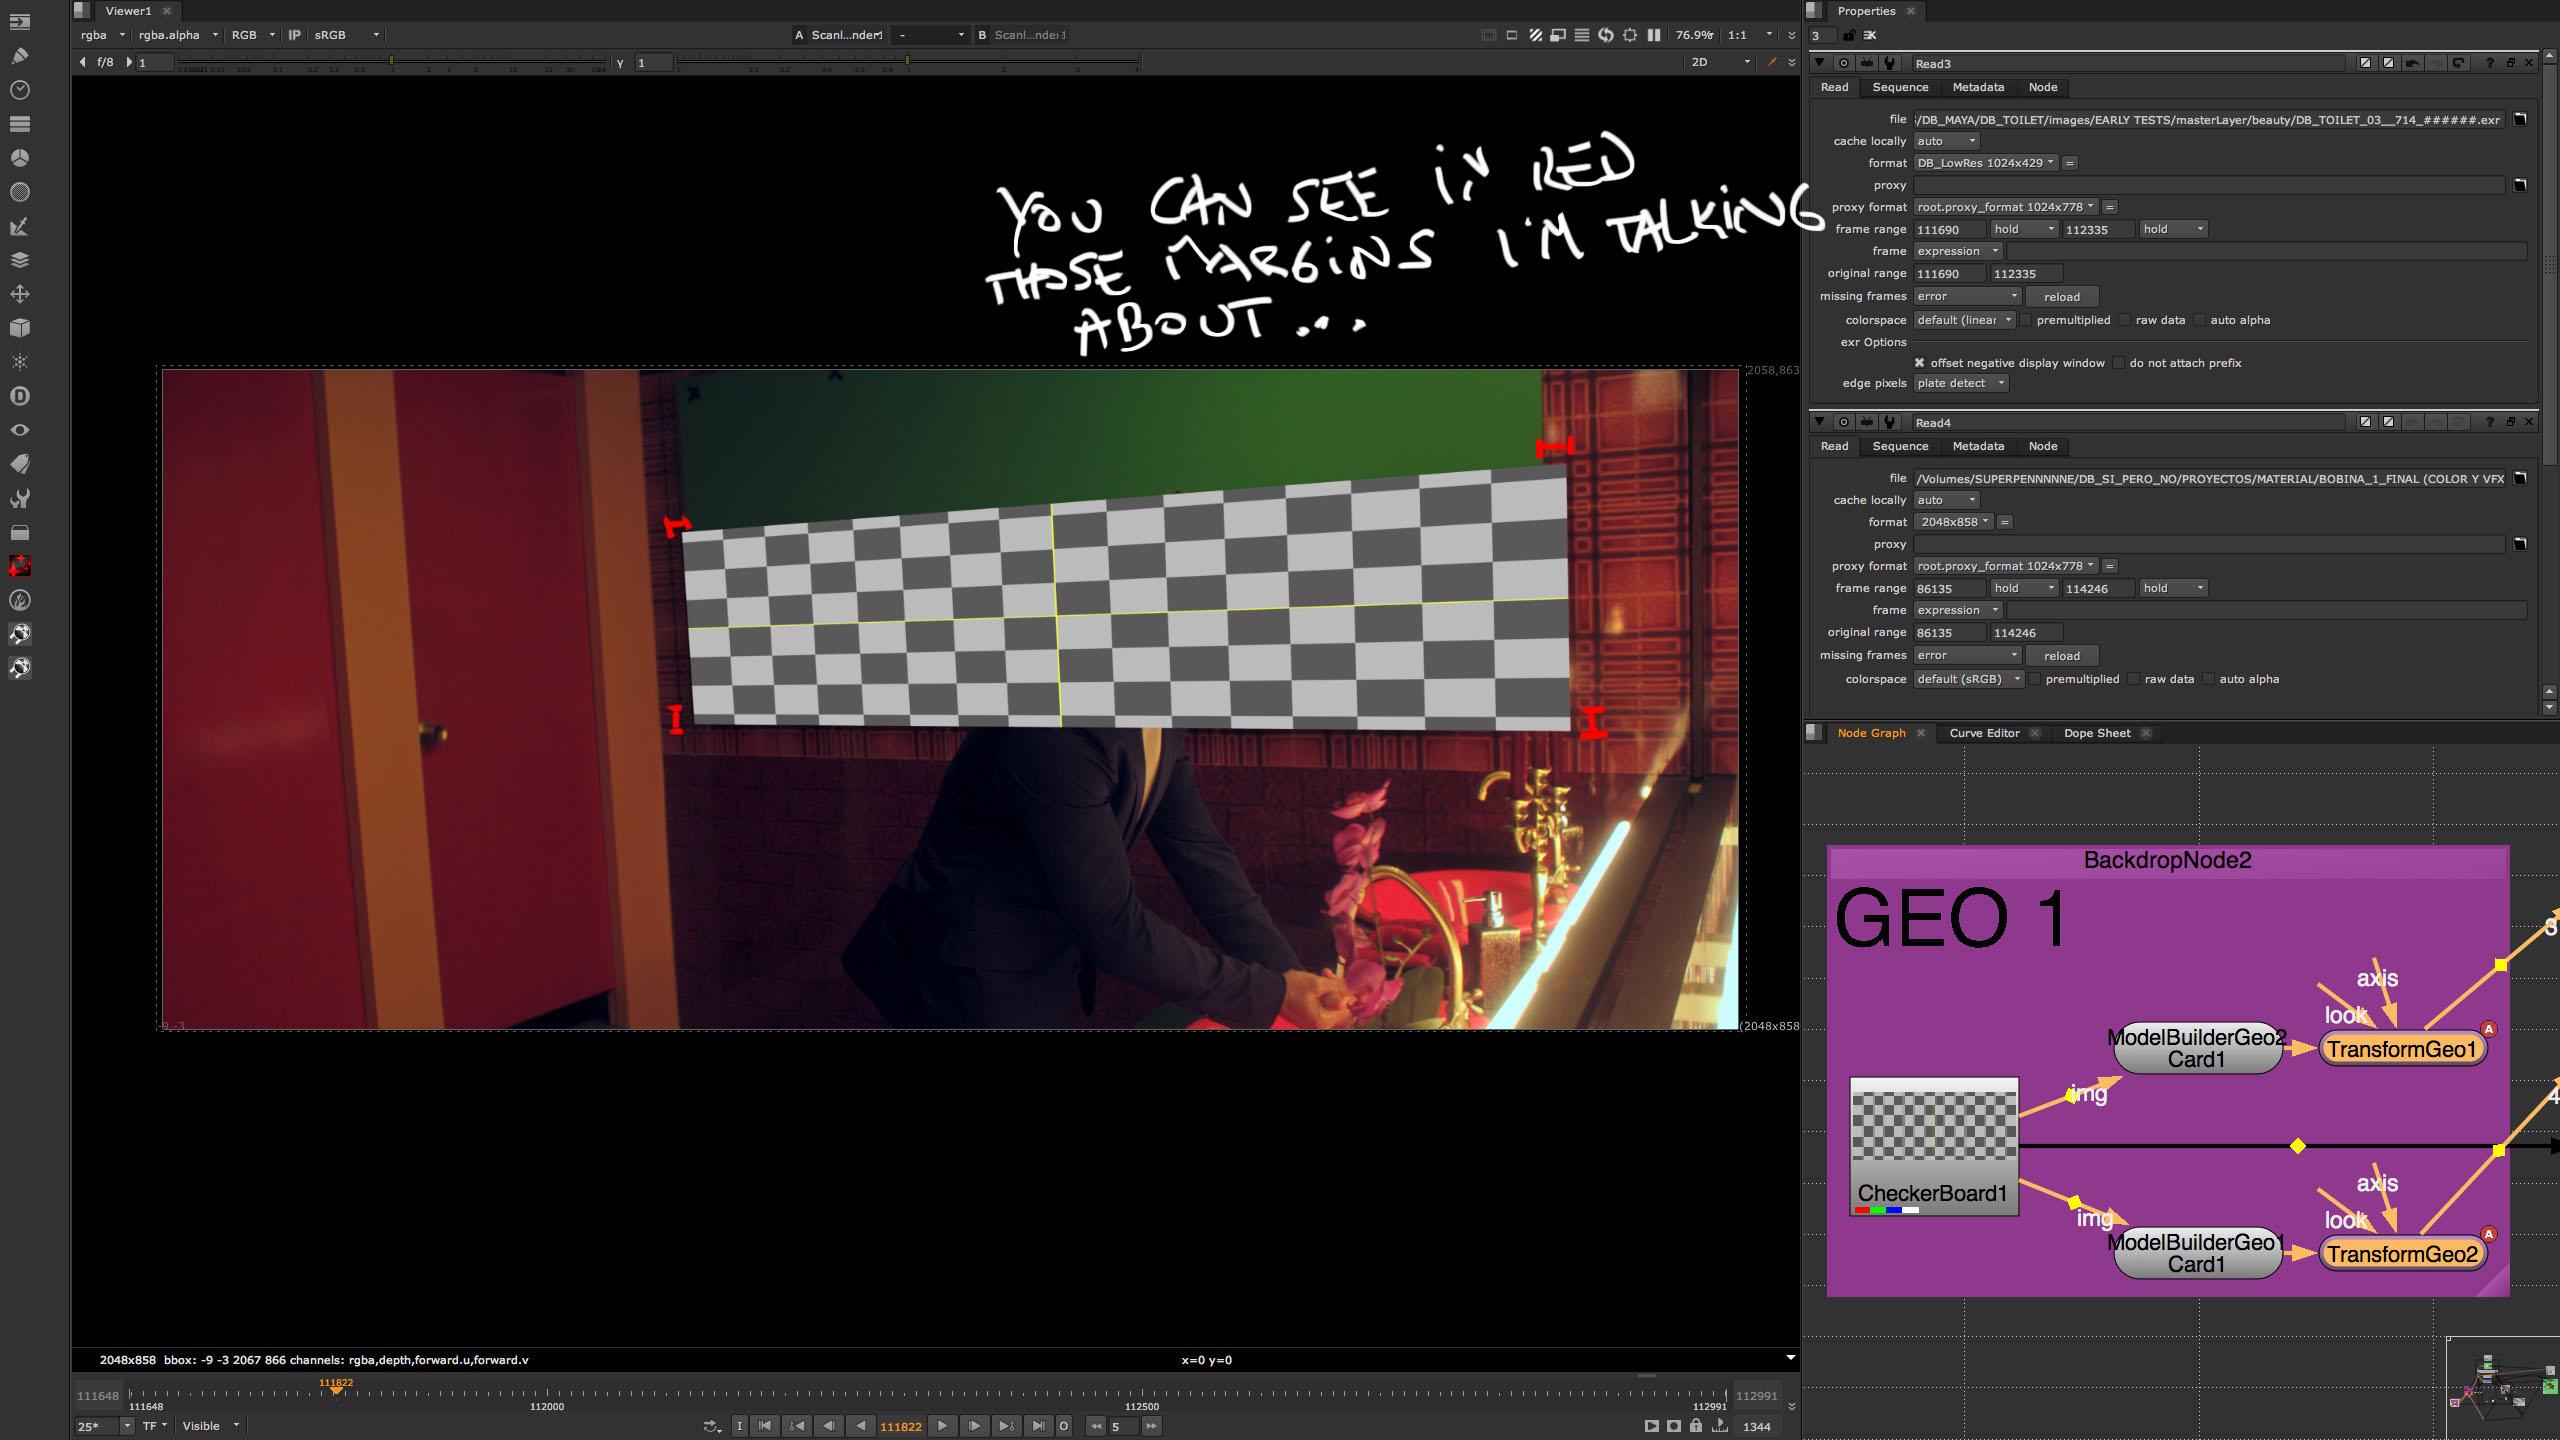
HEADS UP, YOU DOGS! This size “bleeding” on modelBuilt plane (as insignificant as it may seem), these “margins“, would later rise as the most important decision made from day one to delivery… Stay tuned.
Now I had some geo to help overall tracking with some survey points and to assist me later on CGI building in Maya. From there, I would just carefully add tracking data forward and backwards (Nuke 8 new feature for camera tracker), going cautious when camera would break sharp swings. Imported some user 2D tracks as well to help on the hardest spots.
First 645 frames were tracked almost perfectly. However… there was some drifting. Planes position wouldn’t tightly match live footage all throughout the sequence.
Nothing too serious. So I chose correcting it by keyframing this geo’s position and rotation in 3D space using a transformGeo node. Seemed a better solution than adjusting tracking data in curve editor (keyframe jungle, you know…). Now I had camera motion data and two planes that would slightly move overtime to compensate camTrack drifting. Worked.
So I openned a new camTrack node for the second part of the sequence and used some data from the first one, such as focal length and lens distortion. Same method here but… this second part proved to be muuuuch more difficult. Day after day I would just open this project and spend 8 hours straight in the mensroom. Groundhog day, mates!
It was end of week 2 when I finally got my cameras and reference geo ready to export to Maya… Yeah, kinda drifted estimating timings… And I was just about to drift some more!
Talking about drifting, ladies and gentlemen… Though I managed to clean cam tracking quite reasonably, it was faaaar from being perfect… Light years away… This issue alone would be a real brain burner all throughout the entire project. By far, the most serious problem faced until delivery.
At this stage, although I was embarrasingly delayed and shit was all over me, there was still time to decide if the original idea was still at hand or had to think of something else before moving on to Maya.
Many options crossed my mind. Suicide was my first call. Homicide, the second one. Thought of placing kind of a living wallpaper instead of the wonderwall, Harry Potter newspapers’ style, remember?
Finally, took an extra toilette paper roll… And went for it. This would be my finest piece of shit so far, people.
Next, please!. CGI.
Openned a new Maya project, imported cameras and reference planes from Nuke and gave myself some time to figure out what to do at this stage, taking into account final compositing back in Nuke.
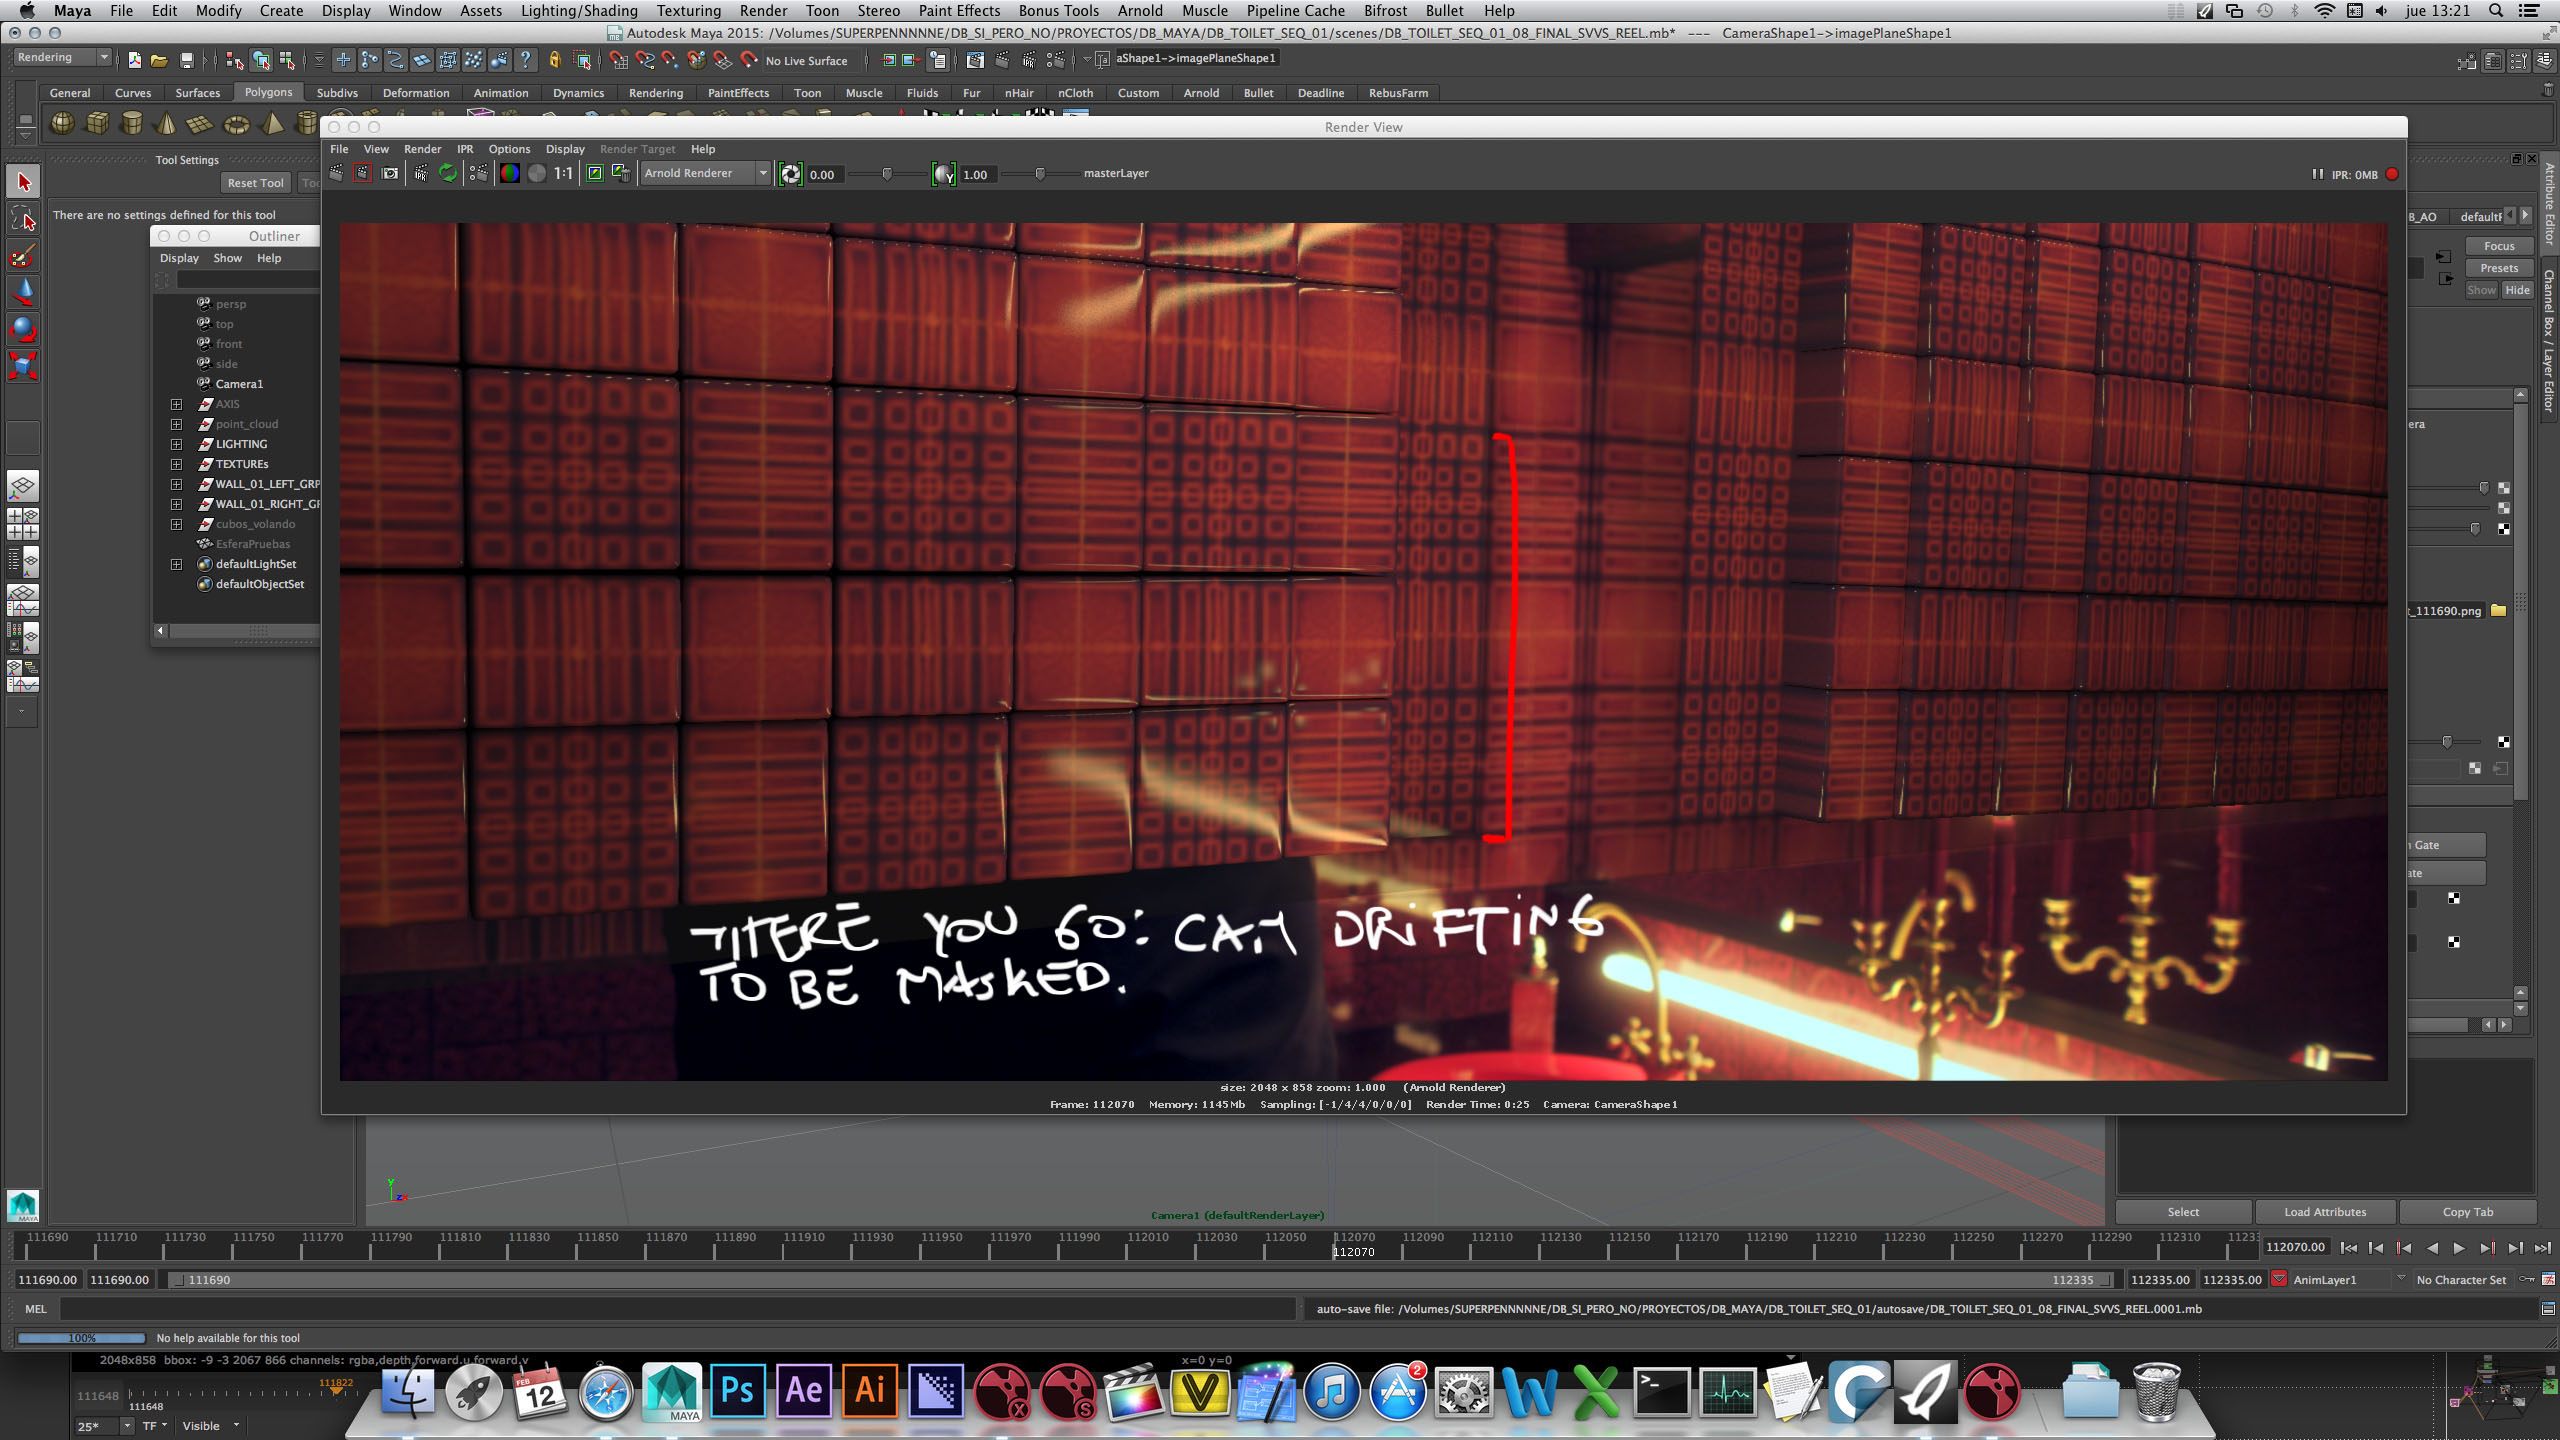
As I told you some lines above, camTrack drifting alone would be a very serious issue almost from day one. So, given how hard it was trying to correct it with results not entirely satisfactory, I was entering panic zone… At this stage I was already thinking of masking errors rather than actually solving them… Basically, main concern here was “how can I trick people into not noticing any geo shaking?”. Walls were all about parallel and perpendicular straight lines. Regular patterns. I knew that if I didn’t solve this right, errors would be way too evident, specially on contact edges.
Conceptually speaking, what I wanted here was some kind of gradual transition between real and fiction, between live footage and CGI. Blending always works better than hard and straight overlaying to get a smoother integration.
So I decided to clean up both walls in the first place and have a fresh start before moving on to modelling cubes.
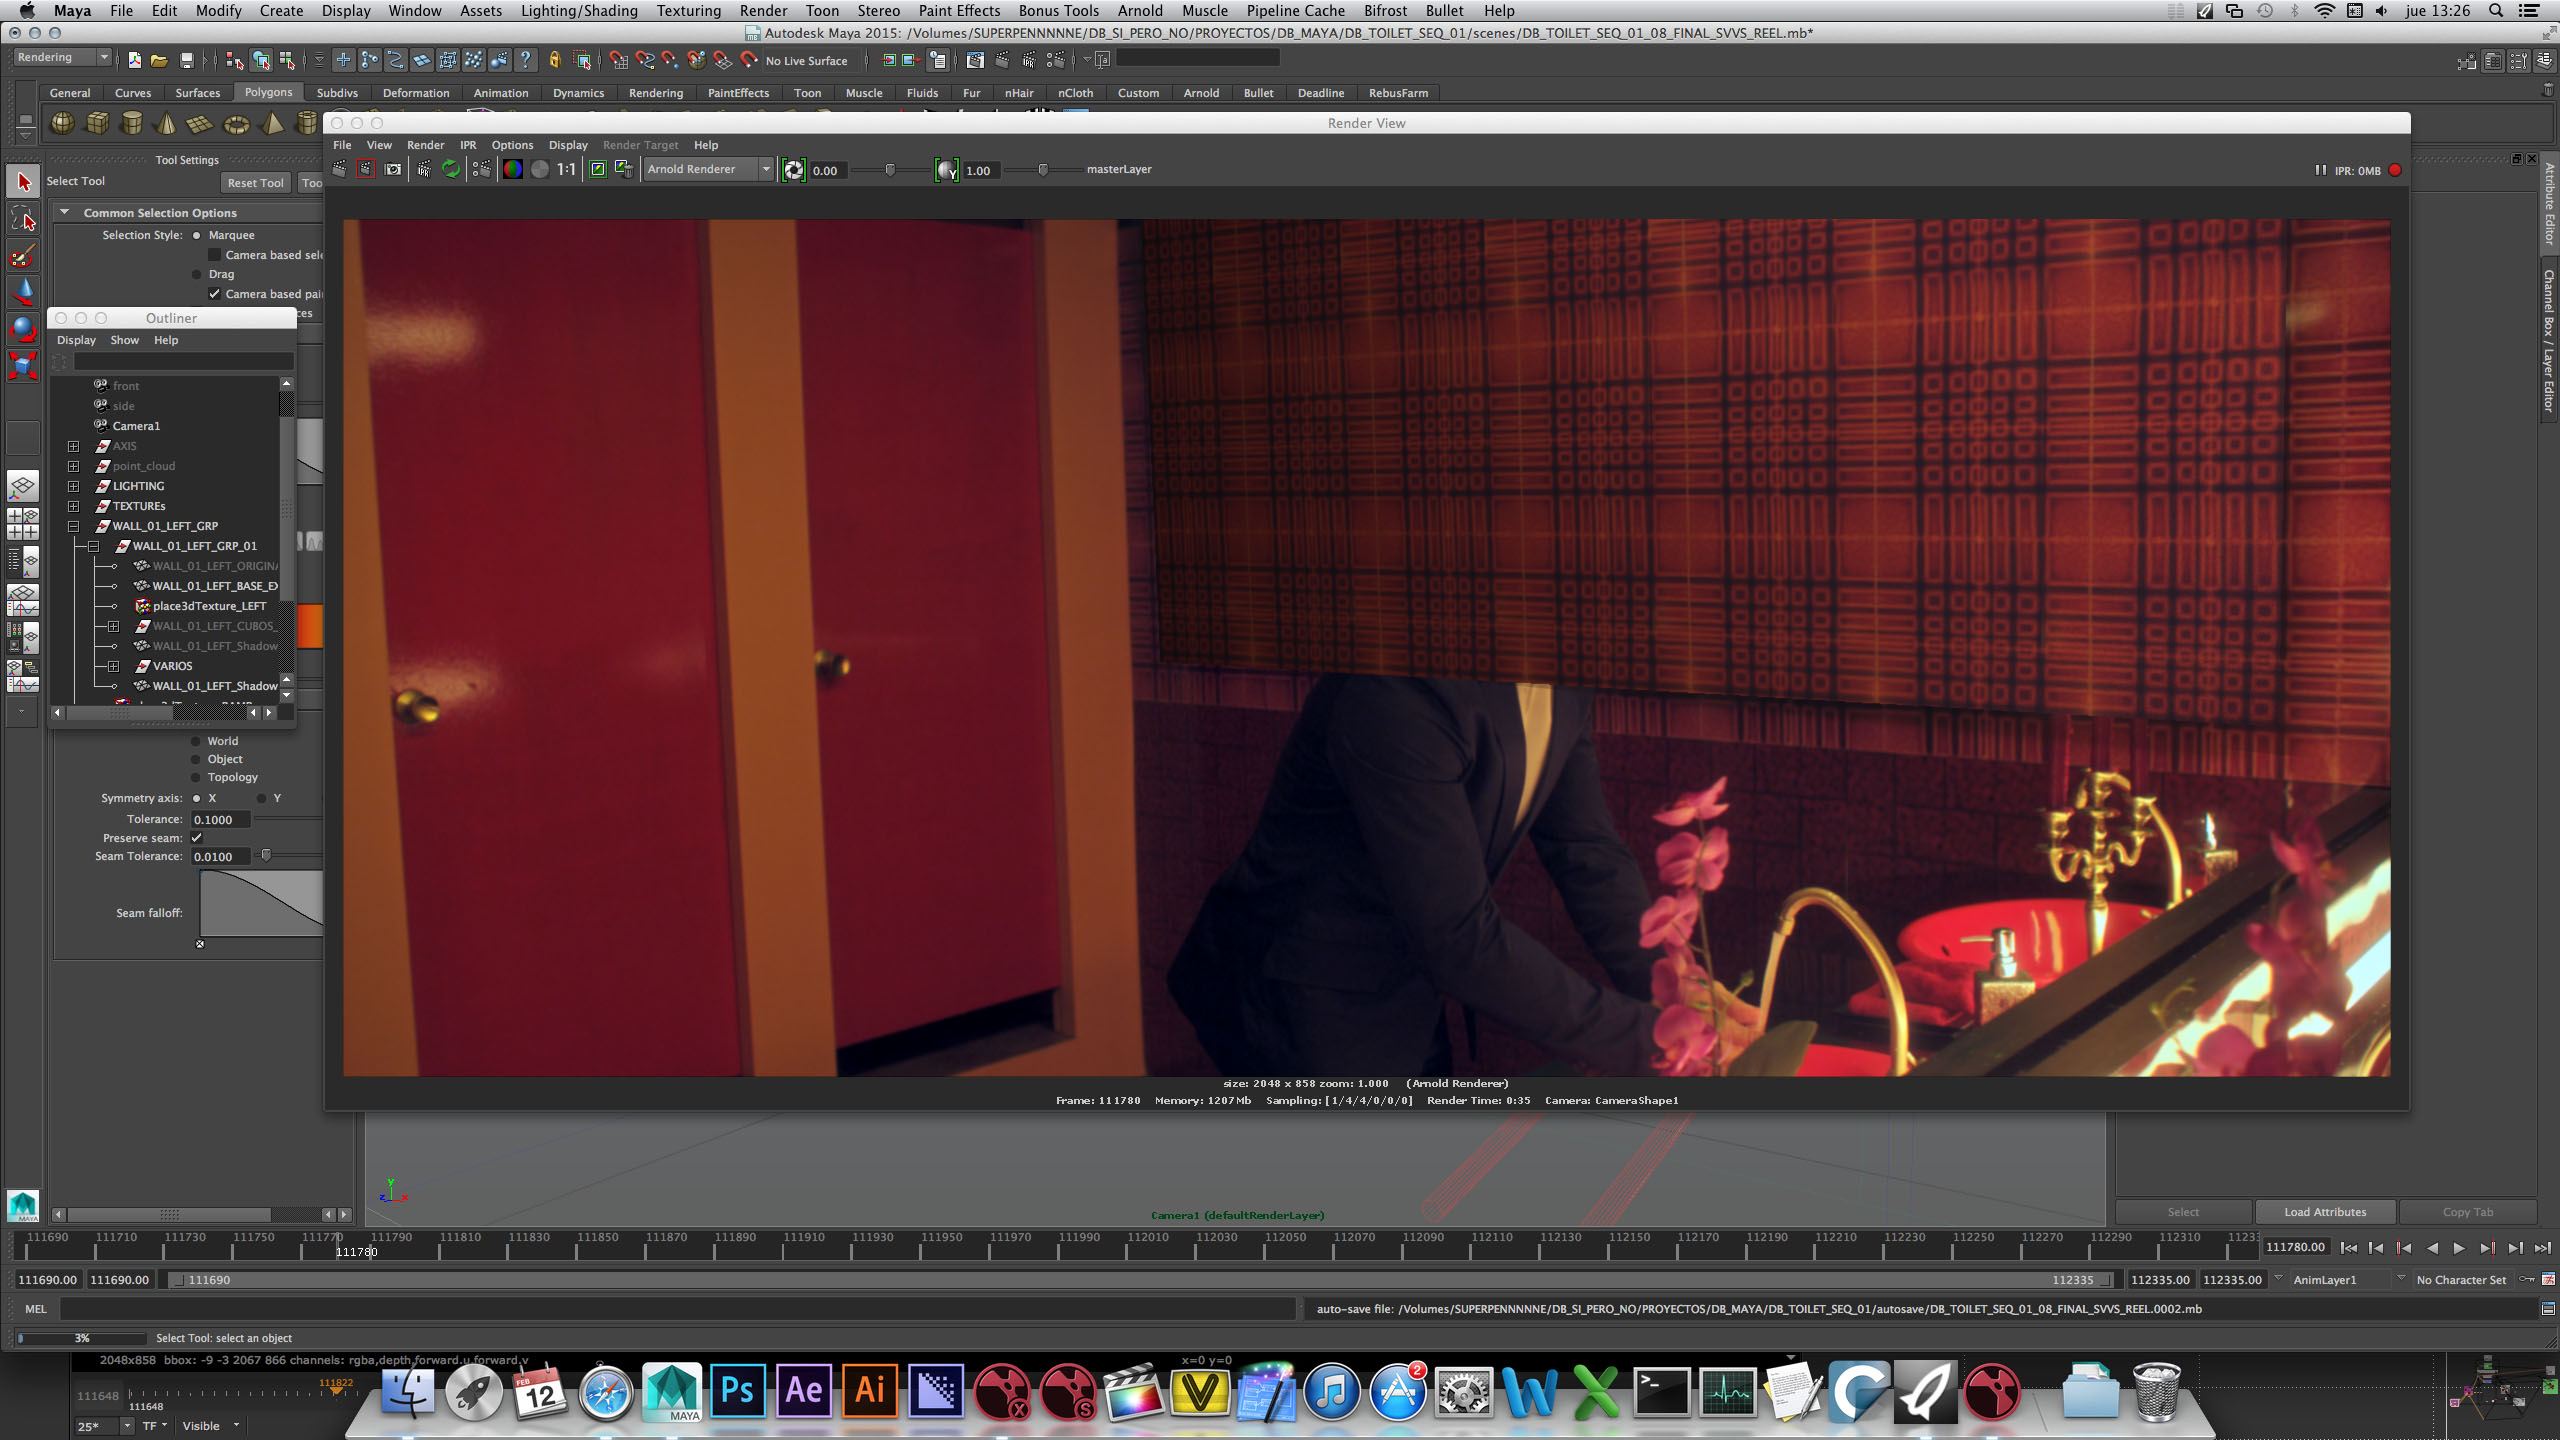
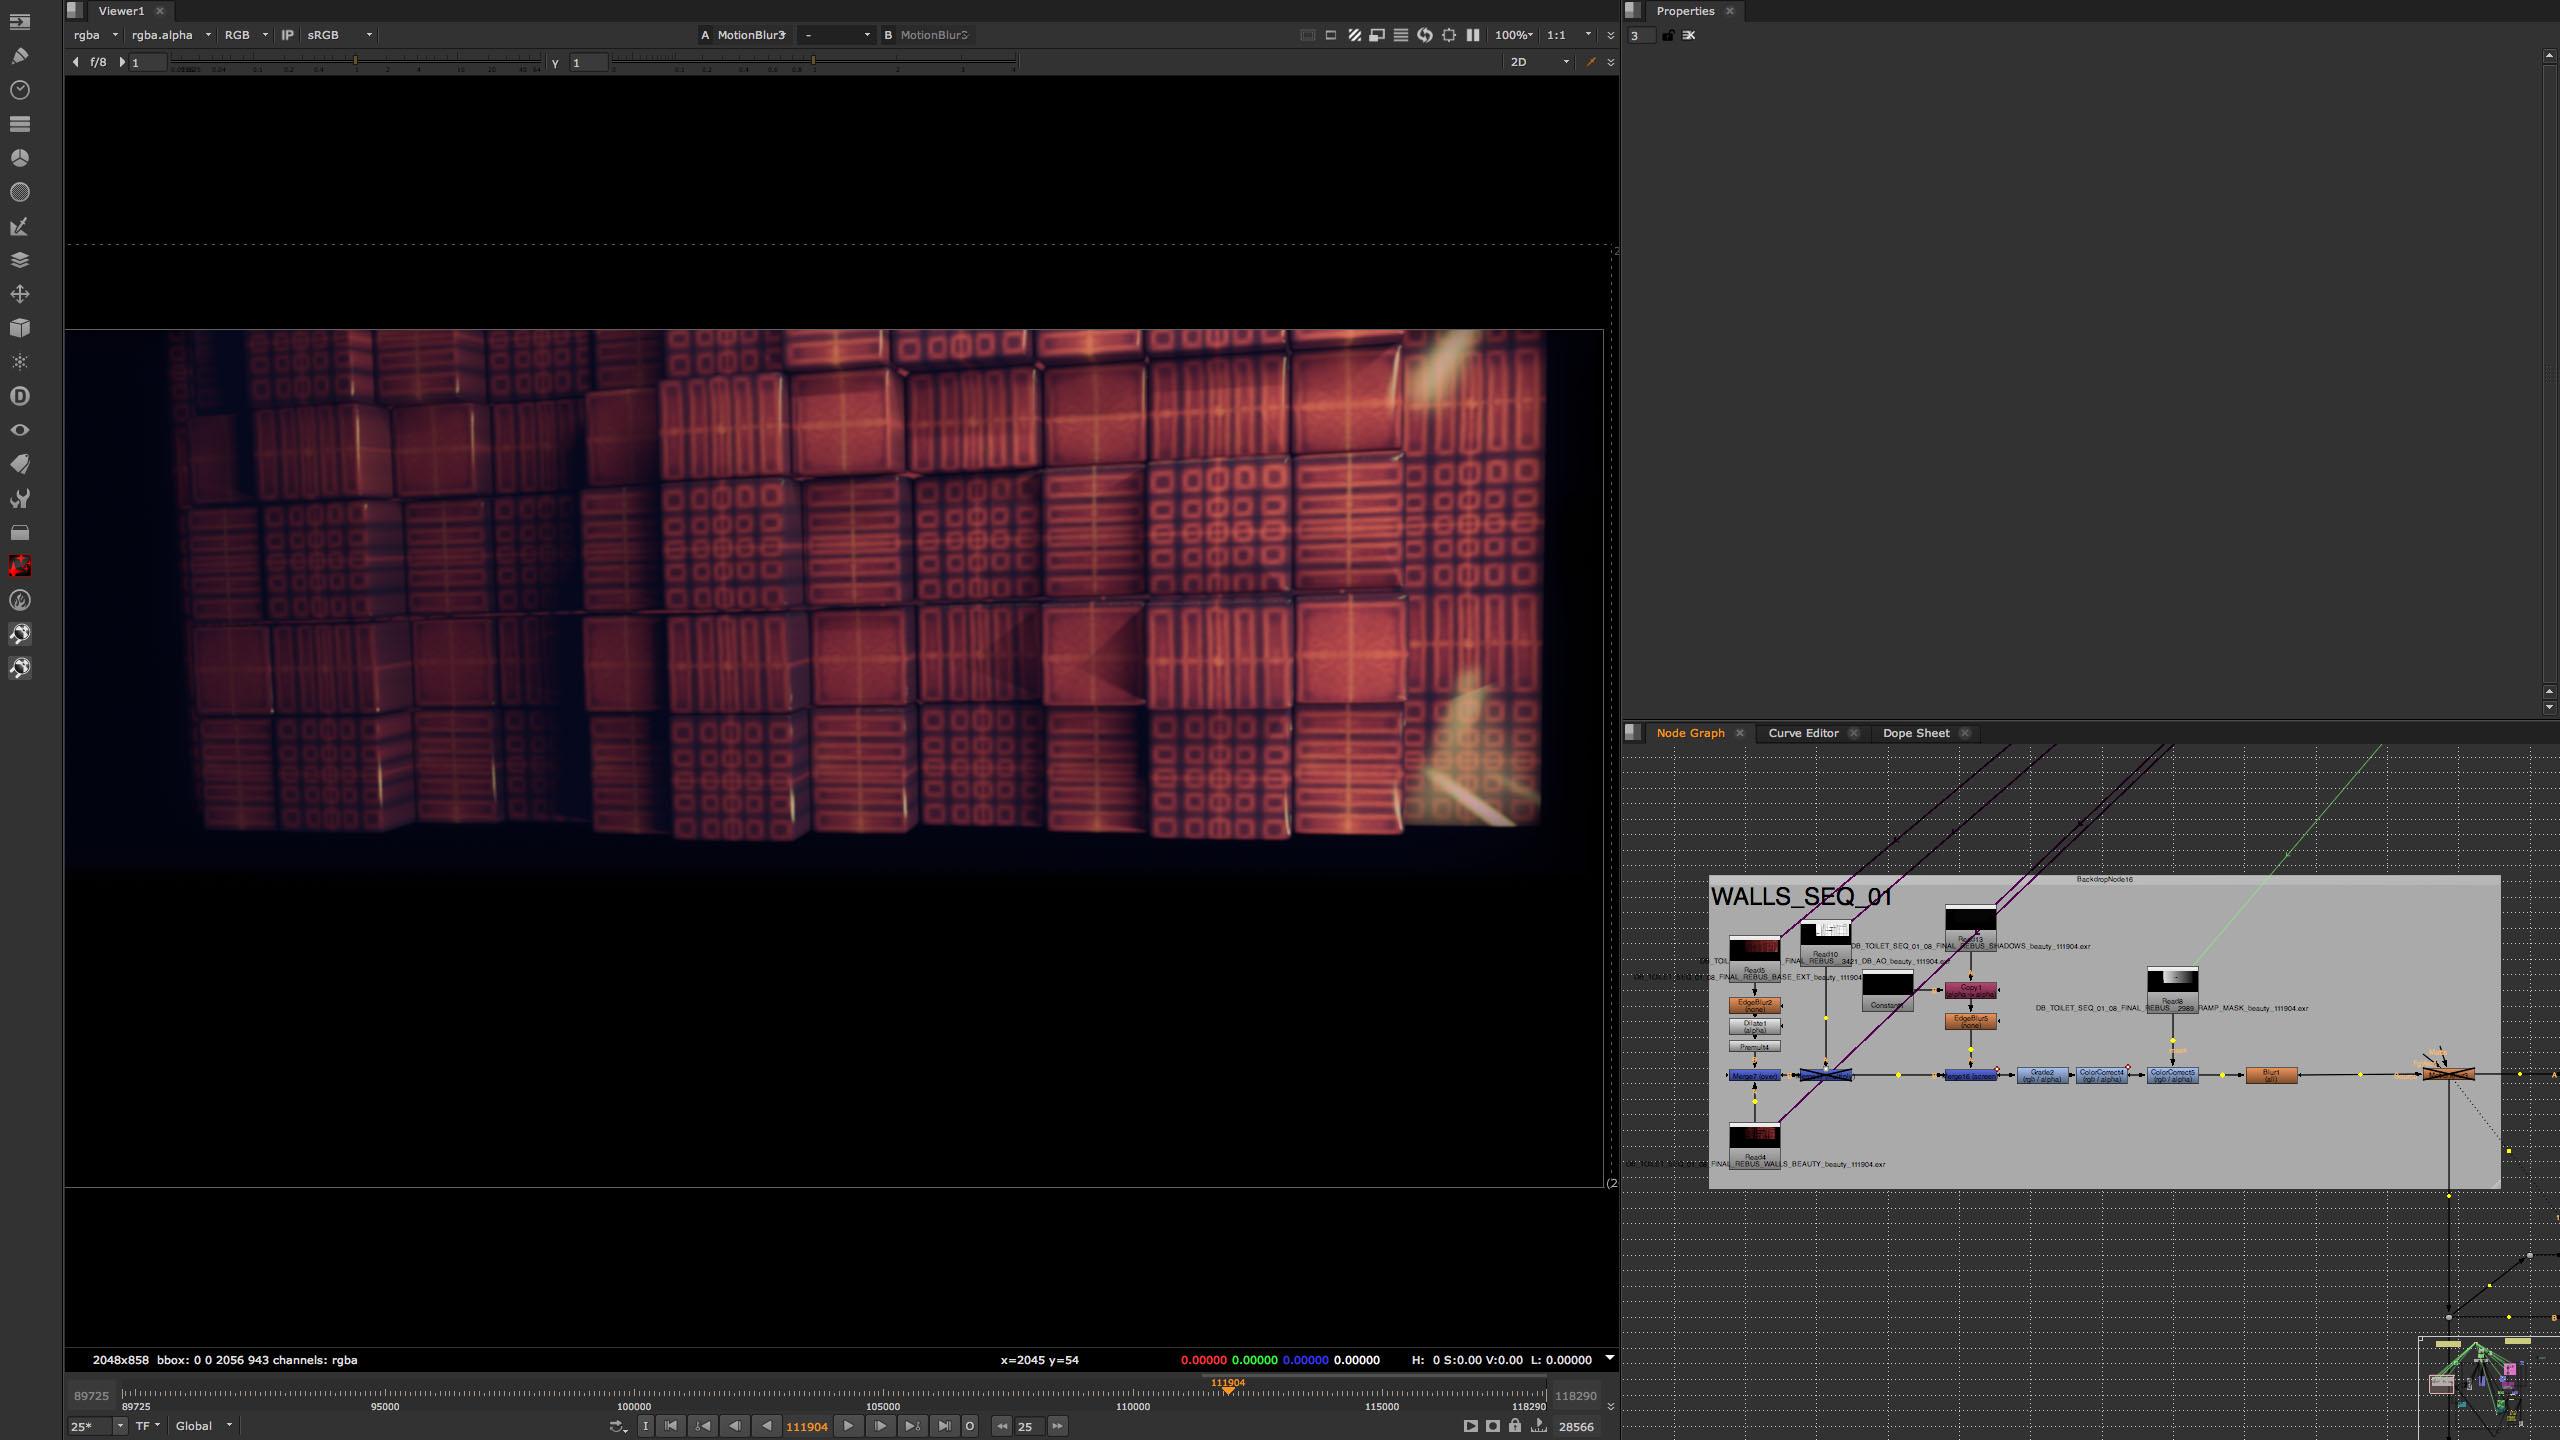
Planes imported from Nuke would be perfect to replace green screen. They would also give me a much more accurate shading and lighting approach than working directly on cubes. Key thing here was… “bleeding”: remember these planes were already scaled up just a little larger than the actual green area, and this overlapping margins would be perfect to gently blend soft alpha CGI edges on top of live footage wall in final compositing. Smooth integration, padawans. This would help me mask camTrack errors, as well as any color mismatch between CGI and footage.
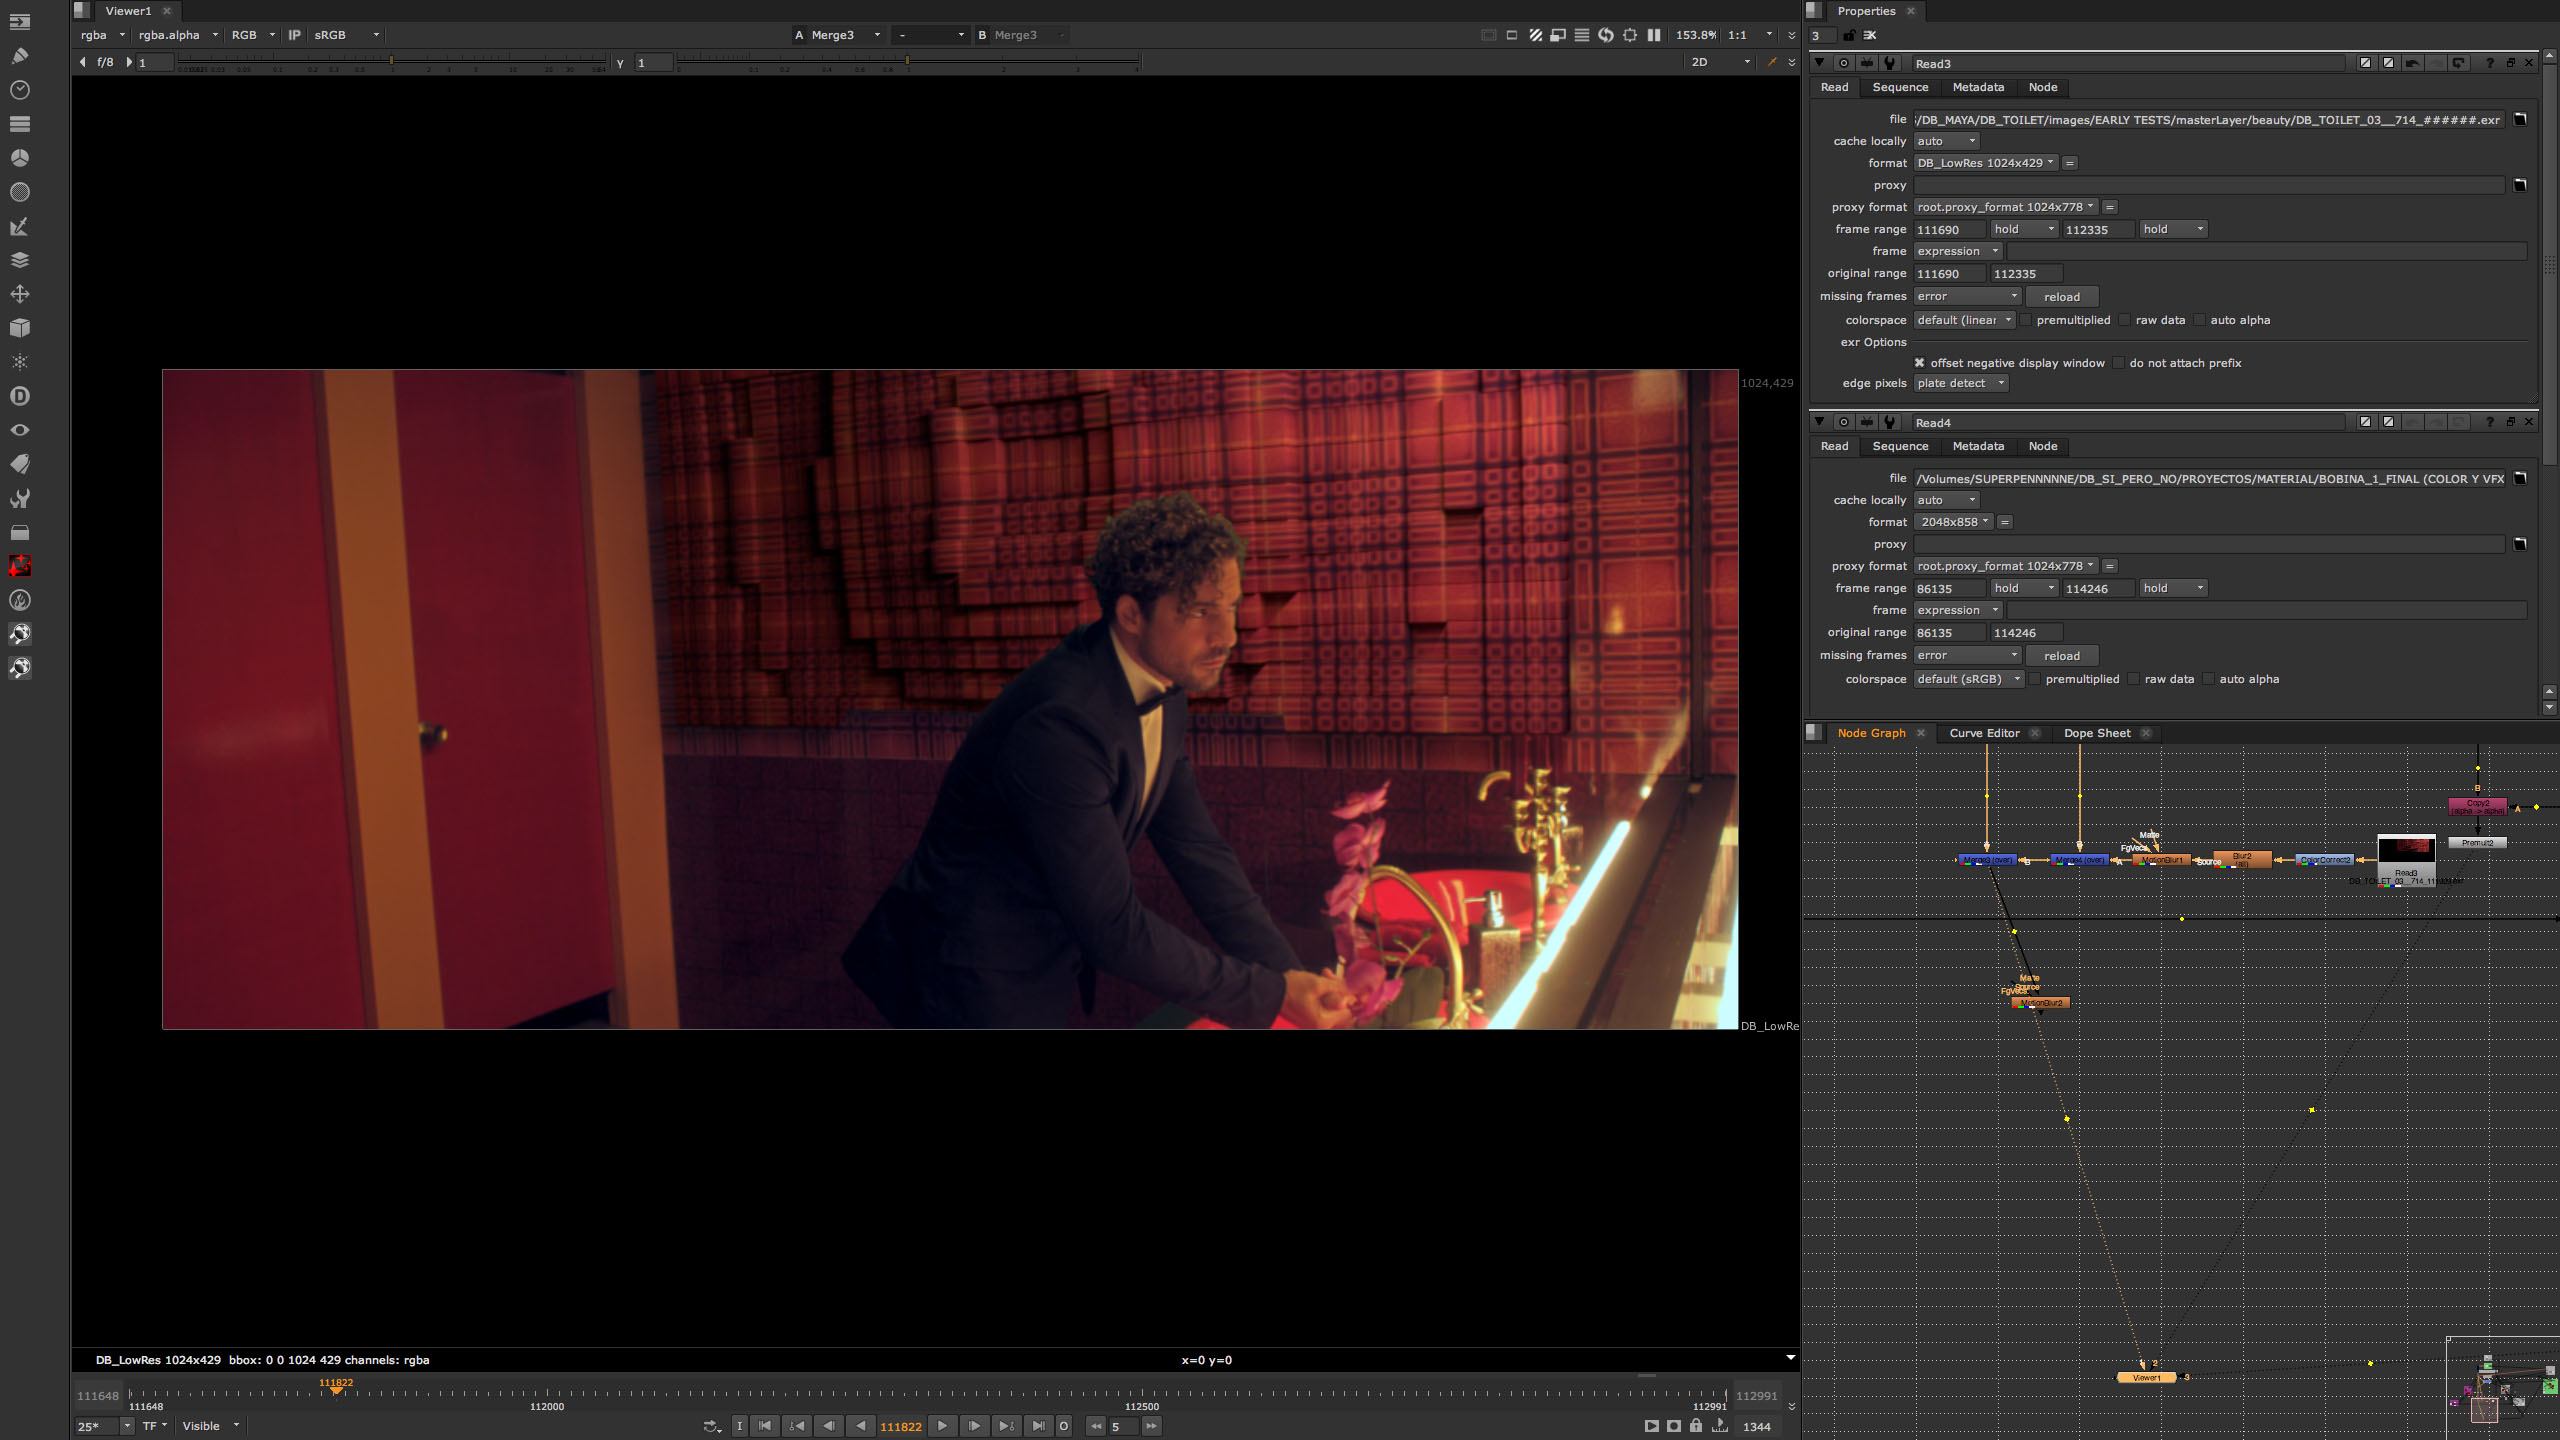
See what I mean by checking out the following lovely series of screenshots taken from the future: next stage compositing over Nuke. Please notice blurred alpha edges for a smooth transition between CGI and footage on contact edges.
Final planes size was also a decision to make: could have made them wide enough to seamlessly span them all across from stall to stall (the more footage replaced by CGI, the less references people may have on screen to compare and notice errors), but then again… wherever I didn’t have a green screen I would have to go through roto hell to compose that curly hair of David’s and girls that wouldn’t stop dancing not even for 5 frames… Not to mention those lovely candles… Knew it would be very tedious and very time consuming…
And time, mates, was something I was running a little short of…
Standard texturizing procedure here: took one evenly lit wall region from some clean frame, photoshopped any shadows out and tiled it onto geo till all lines would match perfectly against the wall.
Then created a couple of areaLights to mimic the actual mensroom lighting, fine tuned couple of things and presto! Didn’t have to be 100% perfect though: just margins where no cubes would be on top, specially margins closest to mirror (which would be the ones fully exposed).
Within this safety zone, I would model cubes laying on top.
So… as dork as I am, and as if this job wasn’t already complicated enough, gave the whole thing an extra push… Original idea was just to have cubes randomly popping out, looking more like a stair-stepped inflation of the wall rather than actual bluejays moving in and out. This is an early test, so you can see what I mean:
Mmmmhhhh… Now that I see it… wasn’t too bad, uh? Anyway, I wanted this shit to be more realistic: I wanted entire bluejays moving in and out. Something like this:
Overall, modelling, texturing and lighting wasn’t the worst nightmare. Just an array of beveled cubes taking into acount actual gaps on footage.
Then parented arrays to planes imported from Nuke (remember these planes’ position and rotation were keyframed all throughout the entire sequence), and used same shader than planes beneath. Animating bluejays seemed quite a tedious task at first sight (obviously, didn’t want to animate block by block). Maya’s softSelect tool was the magic wand here, allowing me to move one bluejay and contiguous ones would follow over a ramped weigth.
Some bump or specular mapping would have been the right thing for bluejays, as they came out too clean. But I was way behind scheduled and didn’t want to waste any more life. I was just running out of toilette rolls here…
Set my passes ready to export: beauty, AO, shadows, color Ramp (keep reading). Wanted depth and motion vectors as well, but didn’t have any more rendering time left and had to leave them out of my wishlist…
Maya work was complete.
Next up: final compositing in Nuke.
June 13th, Friday evening. Friday 13th!. It was little over 3 weeks since I’ve been handed this project, and due date was… June 16th, Monday. 2 1/2 days to wrap it up… I was already regretting not taking the suicide alternative some days before.
So here I was with my CGI passes rendered. Color was good, but some tweaking was still necessary to nail it.
First thing first: matching raw footage color to graded reference clip. Tried to use the new matchGrade tool included in Nuke 8, but for some reason I would always end up with a poor range correction… Even cranking up all parameters… In the end, did it old school: colorCorrecting each RGB channel separately and checking waveforms with the assistance of a wipe gizmo and those fantastic new visualizing tools of Nuke 8’s.
Now it was keying time. Primatte did a fantastic job (as always). Hair detail was just fine on DB and girls, and keying was relatively easy, even with a chroma screen ranging through different shades of green. Obviously, this wasn’t a one click nor one node job: had to chain some nodes together to do the trick. Some rough roto for garbage mattes and no green was visible no more.
Candles were kinda hard to key and compose. Flames, mates… Tricky little bastards. Green screen wouldn’t be enough, so had to roto and matchmove masks to make it happen. A little blurring, a little glowing… And candles were good to go.
Next up: CGI passes comp and color match. Very, very subtletly used some ambient occlusion, as it darkenned gaps too strong. Shadows were also pretty soft and slightly blured.
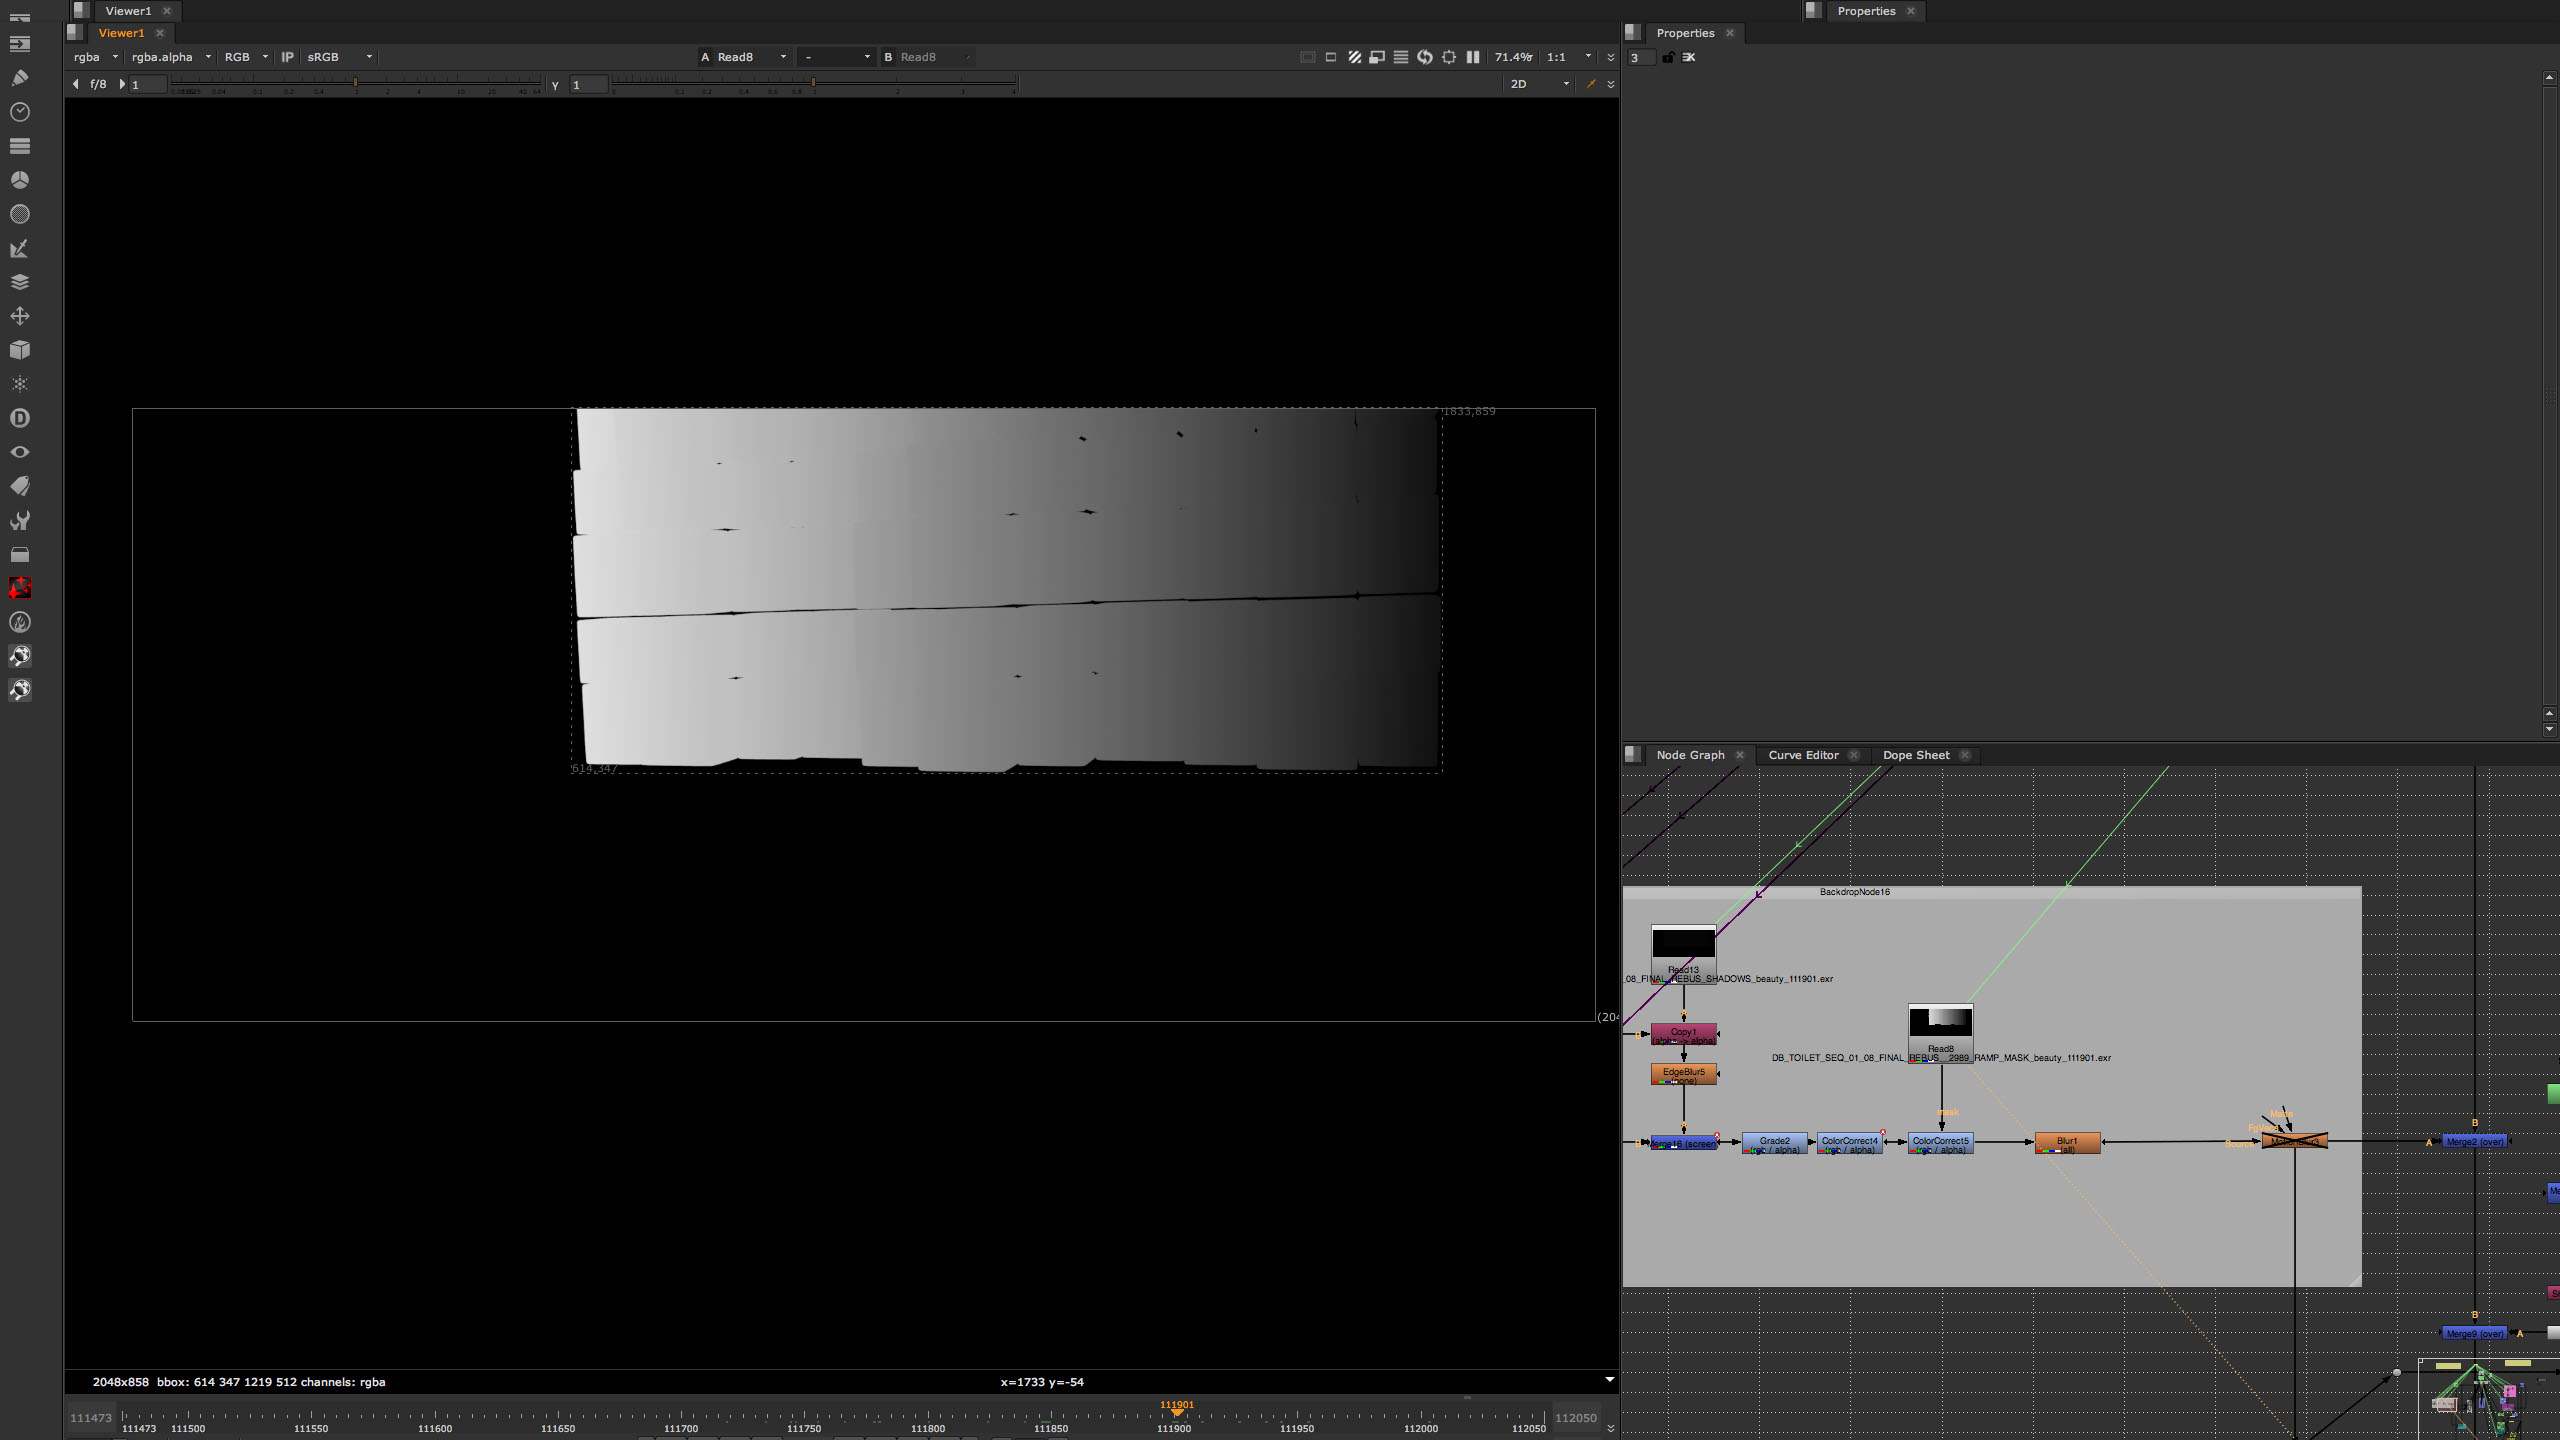
Color… was somehow more a bitch than fun: the closer to stalls, the bluer footage wall seemed to get on shadows regions. I had noticed this previously back in Maya and pulled a “ramp” pass to feed colorCorrect nodes in Nuke. Worked like a charm.
And now… One of the bitchest: ROTO! Told you keying wouldn’t be enough to compose characters on top of cubes:
Thought it would be easier. Then girls came out of stalls and gave me the chills… Pffff… Tried to find anything trackable to help me matchmove roto masks, but those pussies wouldn’t just give me shit to work with… Ended up keyframing almost every 2 frames… Silly of me: should have used old faithful keyer node to pull some luminance keys instead of playing the chimp moving vertices here and there…
But brain was not exactly a quantic computer those days…
Next task, an easy one: lightwrap. Nothing too demanding. Just a little touch of background bleeding over foreground action.
Then addressed DOF. Wall was pretty much in focus all throughout the complete sequence, but some simple overall bluring was still necessary. Just the exact amount to prevent CGI from looking too crispy.
Some motion blur at the bottom of my CGI node tree and comp was, at least, 90% structured.
Can’t quite remember what time or day it was, but sooner or later had to face my Lex Luthor on this project: camTrack drifting correction. Arrrrrrghhhhhhh… Roto keyframing was tough, but this would be just puuuuuure pain…
Brute force, mates: just a simple tansform node, jumping every 10 frames reviewing and adjusting any CGI position error compared to footage, then backwards but offsetting 5 frames… What a nightmare… Nuke’s RAM playback is OK for 99% cases, but not for checking how well I was doing here… Had to render short sequences to effectively know what the fuck was going on.
Did my best, and put my heart on it, but truth is… by Sunday 11:00 PM I went to bed just burnt out and with a final sequence full of errors: CGI drifting was, of course, my worst. Looked like I would have handed this task to Michael J Fox…
June 16th, Monday morning. Due date. This is it? No more time? Well… Universal Music supposedly wanted to have this clip ready to distribute… right away. However, I distinctly remembered our first meeting with Universal guys, when they had set distribution date for this clip by end of June, beginnings of July…
Spent entire Monday cleaning up things here and there to deliver a decent DRAFT copy. Uploaded it last thing that Monday. Knew it would buy me some time until feedback from client. In the meantime, I would keep correcting stuff.
First thing I addressed was some weird dark edges around Primatte garbage masks on characters. Feeding this node with garbage masks was not a good idea, so I applied it after every Primatte node. Also changed output mode to composite (feeding each node with CGI as background) and switched edge replacement to blured background. That would give me seamless integration.
Corrected some color mismatch, fine tuned lightwrap…
But feedback from Universal was still silence… Seemed like due date was not that final, so put on my cowboy hat and boots, loaded my Colt and drew: time to shoot camTrack drifting dead! This was an idea that only crossed my mind after delivering that draft copy last Monday. Oxigen eventually found its way to my brains and I was able to… think again.
So big problem with CGI was x/y position shaking. Kind of high frequency hiccups. Annoying. Frustrating. Everything else was quite nicely put together, but this…
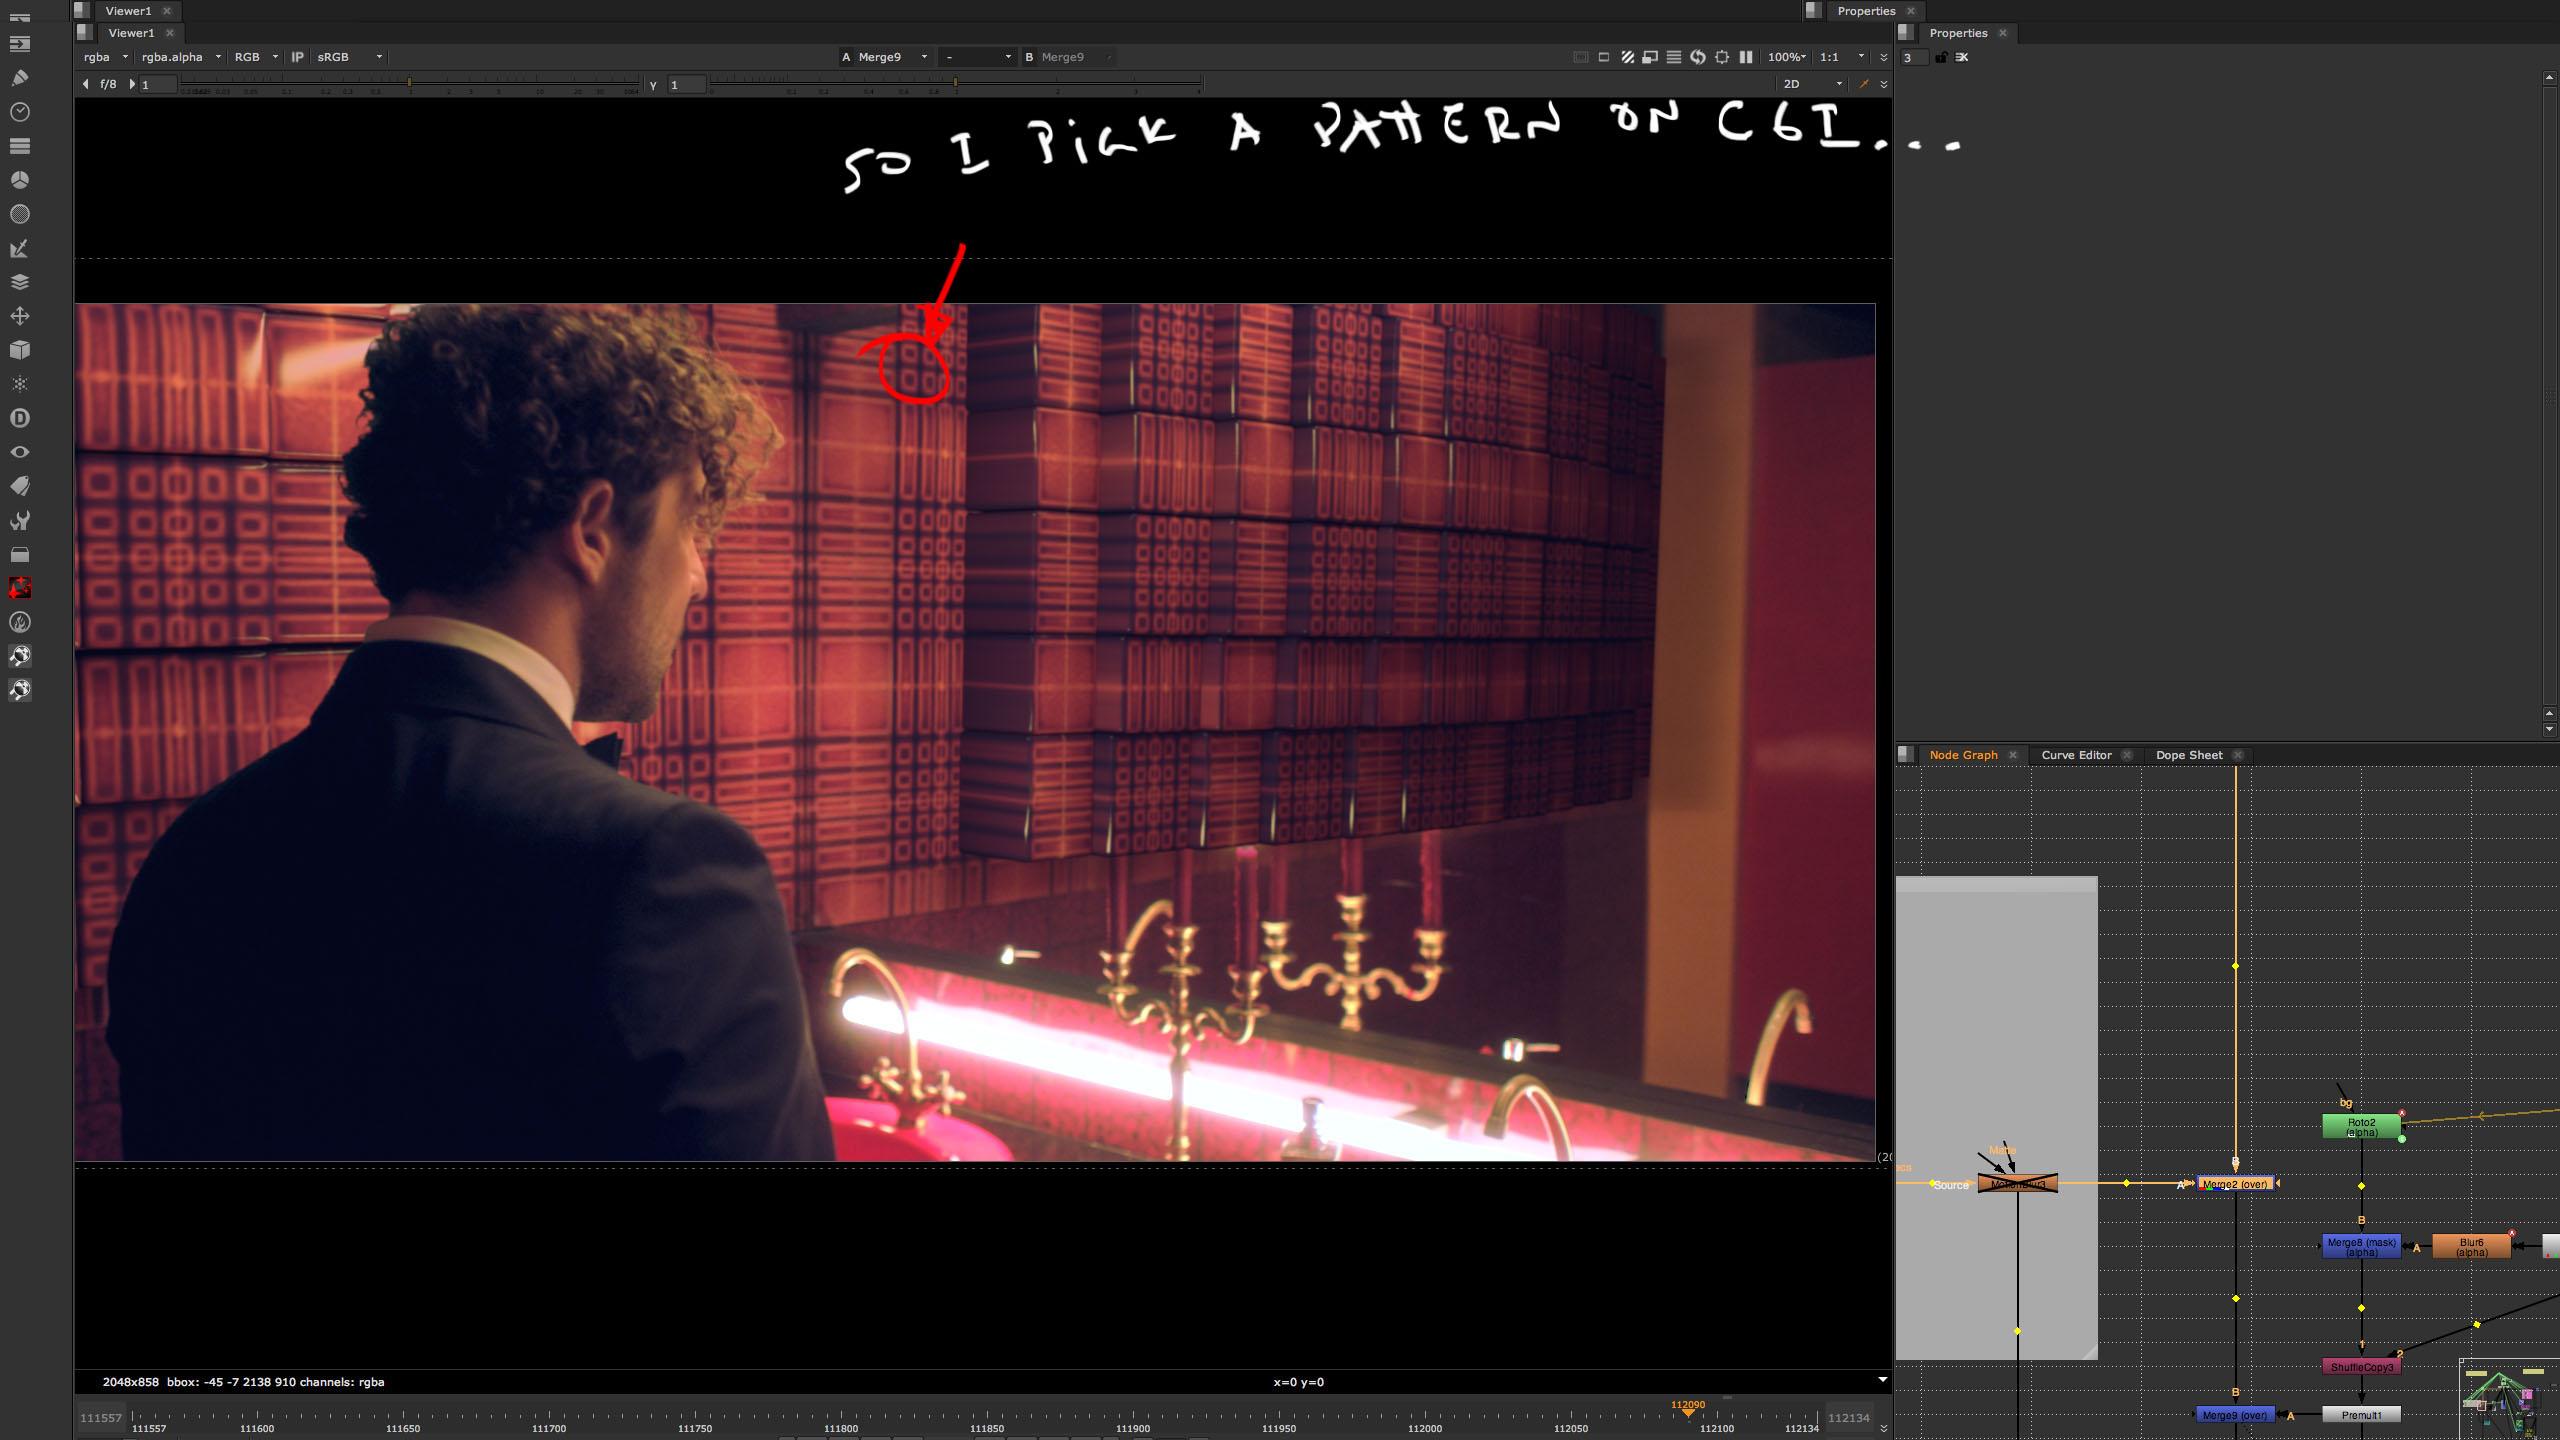
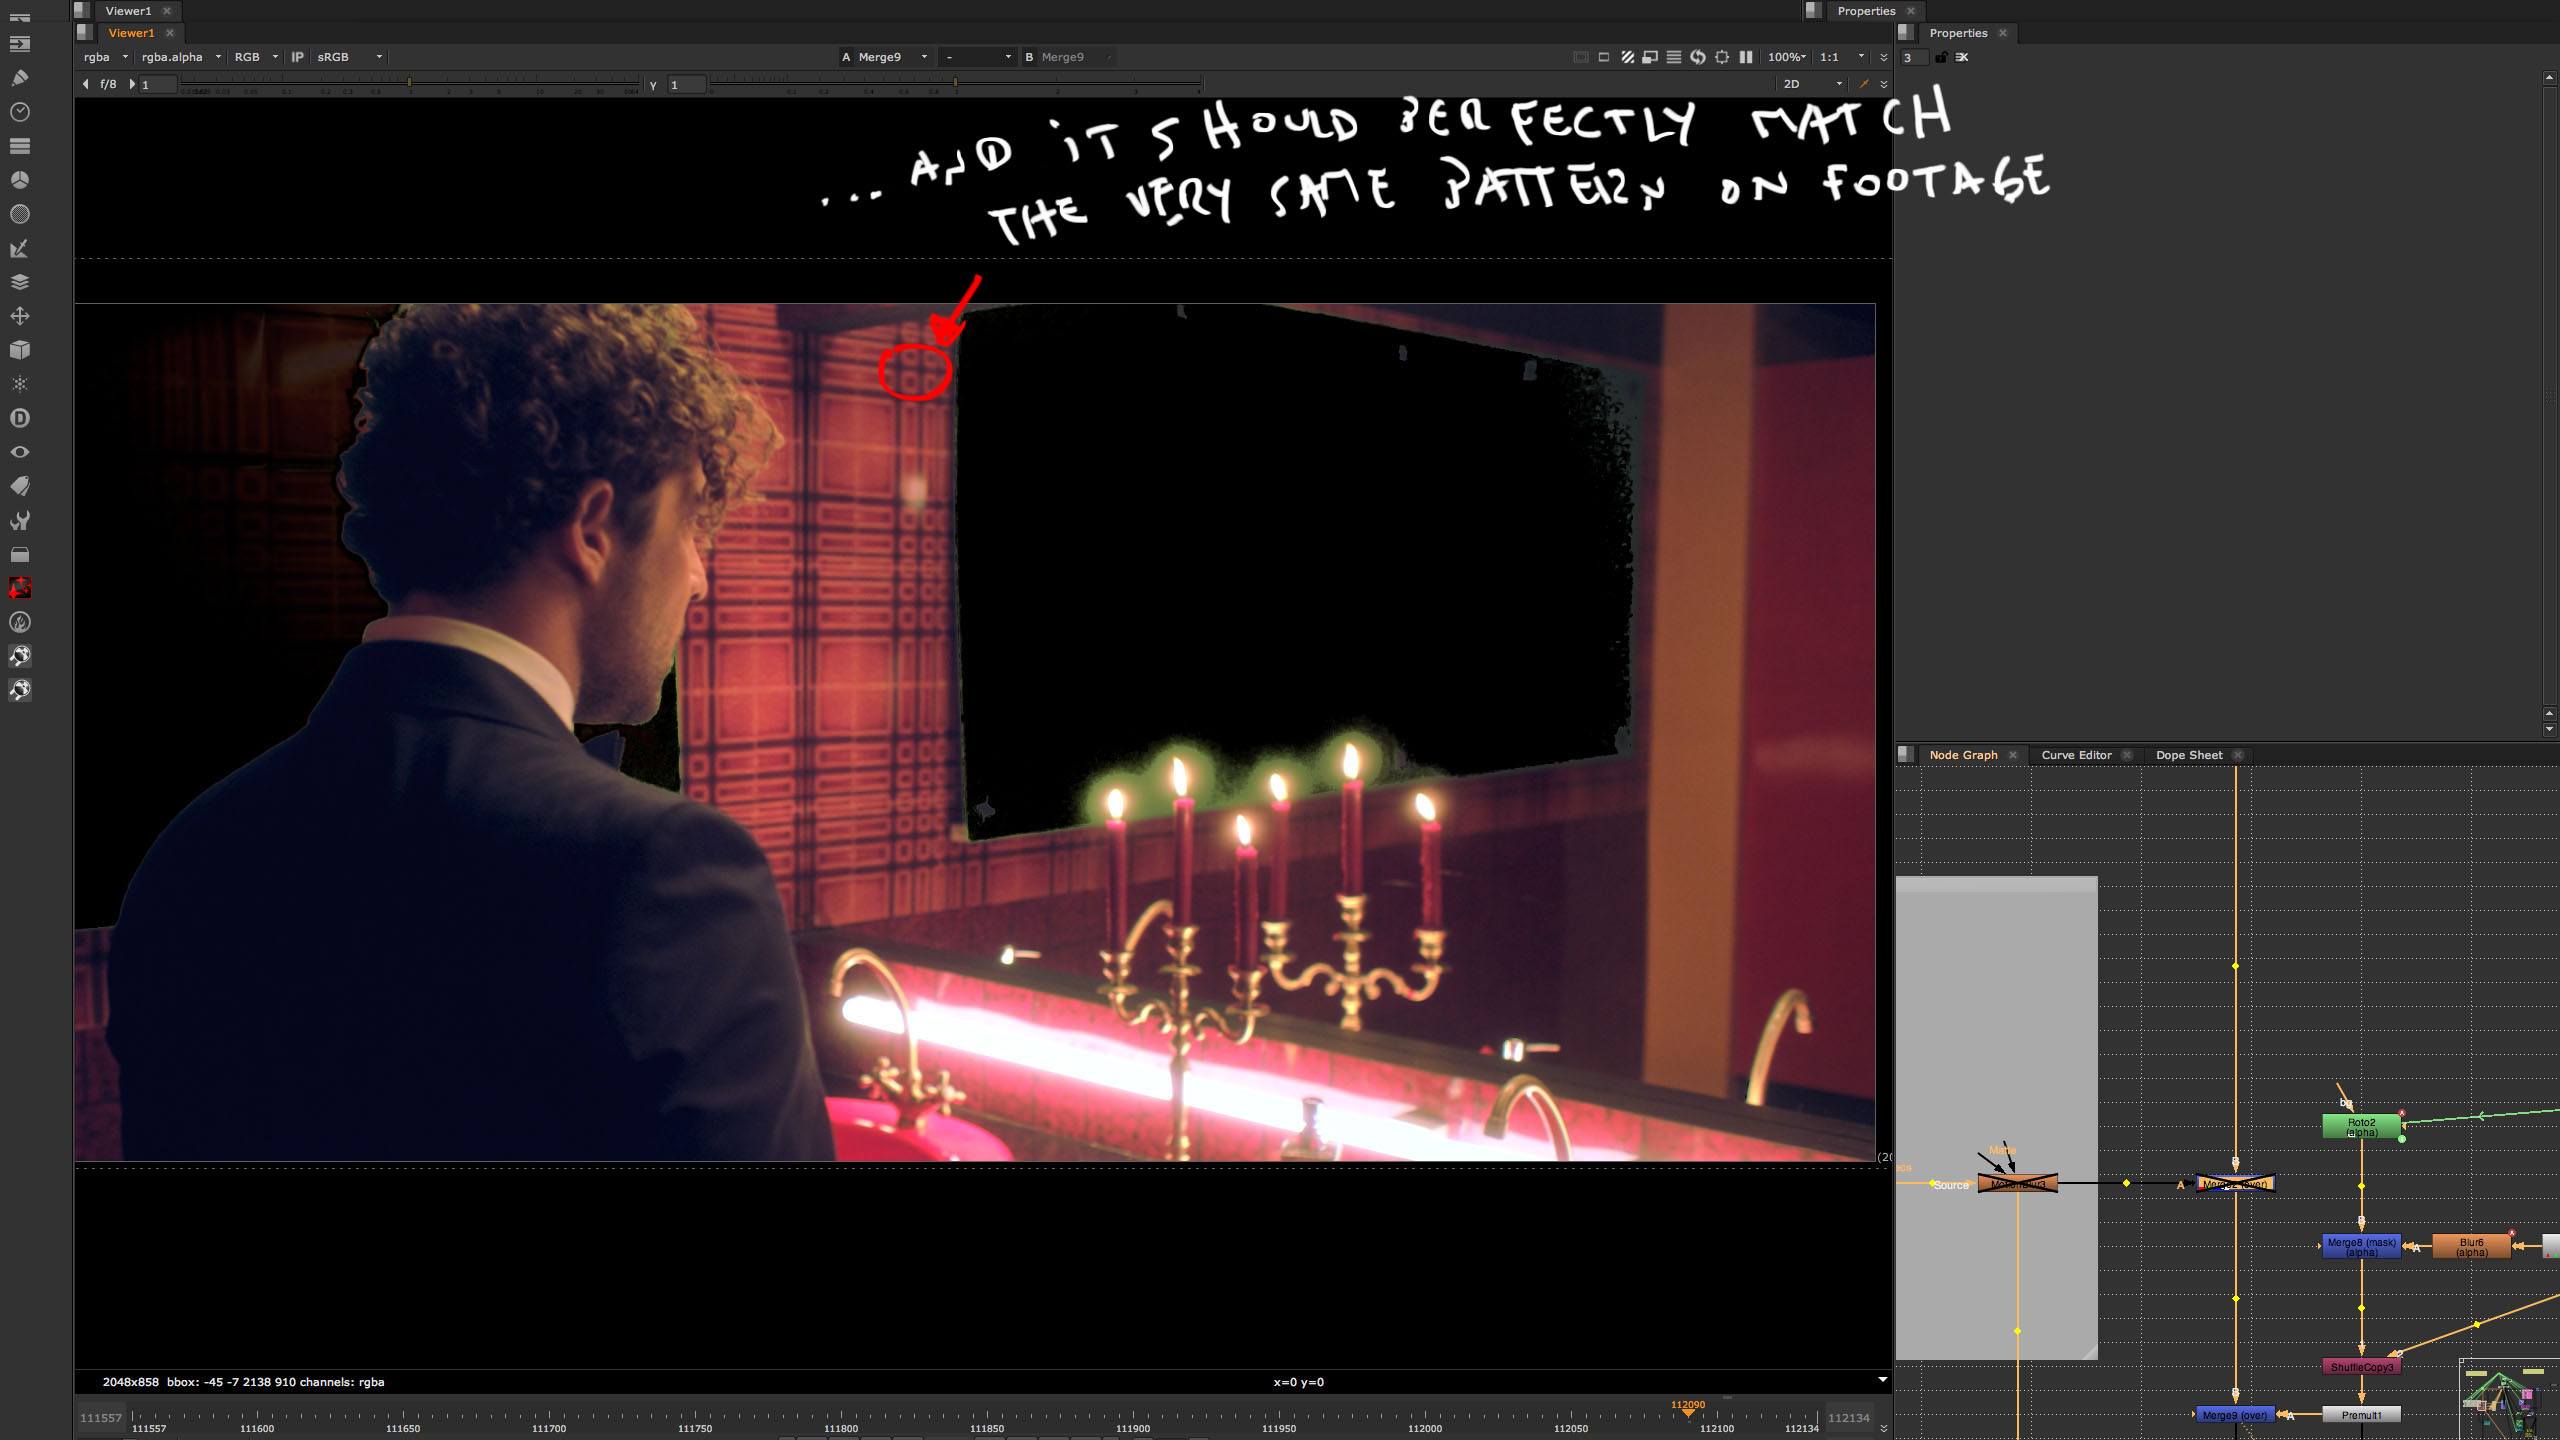
And then it slapped me in the face: back in Maya, I had textured CGI wall planes (beneath cubes) to accurately align vertical and horizontal lines to footage. Seamlessly. If I took, for instance, one corner here:
It should perfectly overlap footage beneath. Like this:
“BLEEDING“, folks! Those margins I mentioned at the beginning of this project saved my life.
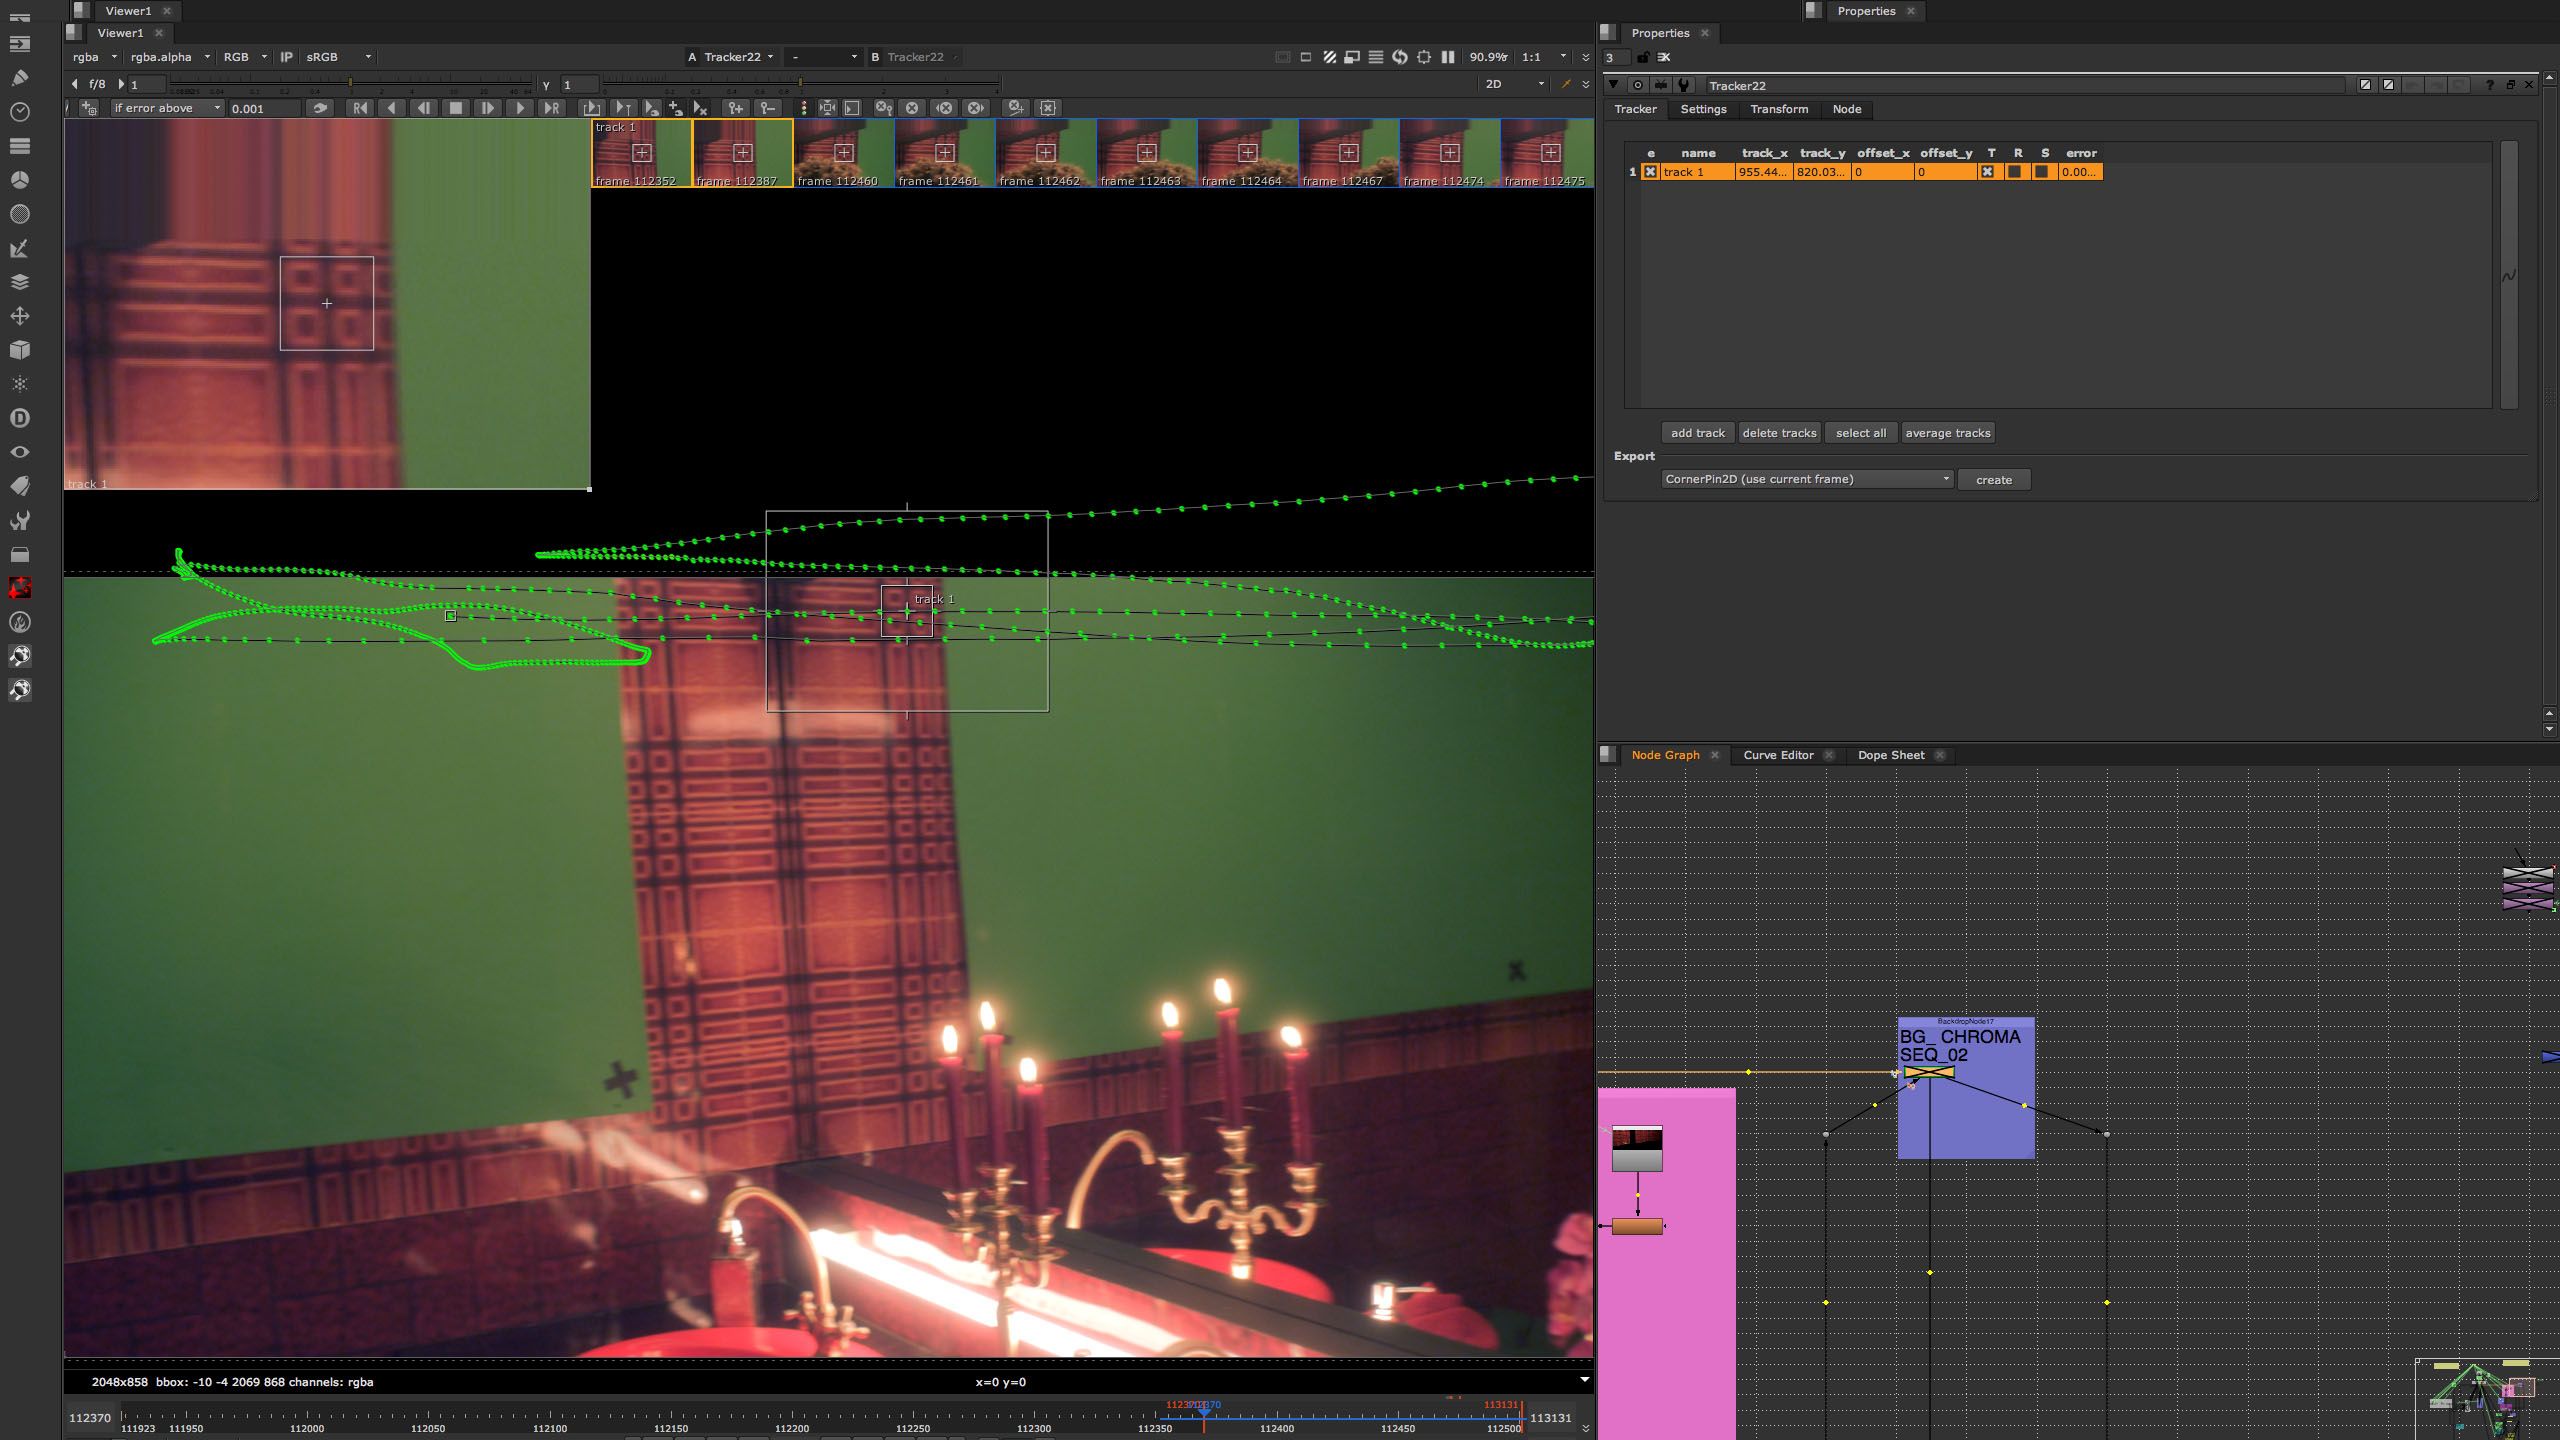
So… what I did was spotting some clean pattern on right CGI wall (in fact, it was a corner) and LOCKED any motion with a standard tracker node. Now I had a wall that would rotate and move in Z axis and crop and do all kinds of weird stuff on screen, but always pivoting around this locked point that would never, ever move.
Then attached a tracker node to footage and started tracking the very same pattern picked on CGI.
Then connected a transform node to CGI, linked position data to tracker’s and… MAGIC.
Magic, I say. Glory. CGI truly matchmoved by footage. No hiccups. No Parkinson. Gorgeous.
No easy task though… Still had to manually correct some difficult spots, specially when offsetting tracked pattern when disappearing from screen… But, overall, it was muuuuuch more like it.
Did the same for left wall. Same difficulties, but this locking-matchmoving technique saved my sorry ass just in the last minute.
It was 4 days past draft delivery, and finally got some feedback. Nothing too serious: just some roto to adjust. But now I had a solid integration which I would only have to polish some more.
And storm was over, fellas. Some clouds still in the mensroom: Kike wanted some editorial changes on the rest of the clip. Nothing that Final Cut Pro X couldn’t handle. Replacing some shots, audio sync for the last part, some retiming… that kind of stuff.
1 week past due date I already had 99% of the final version. On July 4th (God doom America), final piece was delivered.
Yeah, guys… Almost from day one on this piece got the word “delivery” carved in my brains. However, the word I truly now knew the meaning to was DELIVERANCE. Oh, boy… The feeling of RELIEF, as refreshing as mentol Head&Shoulders (you should try it).
Day after day I would check on YouTube for this video clip. After all the rushes, after all the pain… Even got to think video wouldn’t ever be released. And two and a half months later… video was on air.
So pulled my pants up, people, and finally got out of the mensroom with my ass clean and a big smiley on my face. Cowboy hats and boots still on and my Colt reloaded, ready for the next duel…
